29 Mar

2013: A Hackerspace Odyssey

devnuts

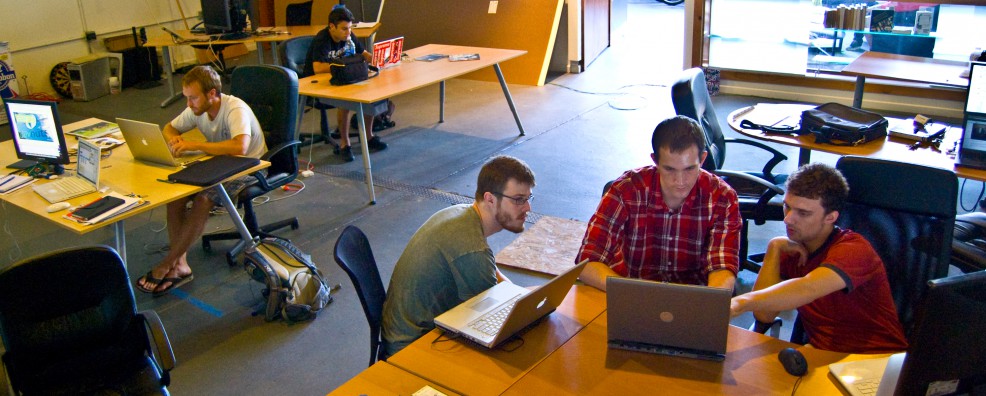
We’ve been hacking at a hackerspace for our next hackathon. For me, the term “hacking” is one of the more egregious tech misnomers, because it seems to imply taking something apart. Of course, it used to mean something different (such as breaking into a computer system) but all I ever see at hackerspaces (places where hacking occurs) are creative people making new things by grabbing data from the web, modifying code and bending it to their will. Devnuts, in Northern Liberties, is where we’ve been gathering on Tuesday nights for the Code For Philly meetups. That’s not us in the photo of the Devnuts space above, but you can spot Code For Philly organizers Christian Kunkel and Chris Alfano (who also work at Jarvus Innovations). The Code For Philly meetups are a great way to get started on a project, learn a new tech skill, or just see what people are doing. The sense of community is amazing, and we’re grateful for all the time and resources that Chris, Christian and others put into organizing the event.

In addition to Devnuts, there are many other hackerspaces in Philly worth checking out. Last week, I visited Hive76 and spent a few hours soldering a circuit board. Thanks to those guys for their advice and letting me use their equipment. I hope to someday visit and use NextFab studio, which is more of a building/manufacturing space that might be useful when we start to build the sunflower and the waterproof housing for the sensors. I’m sure there are many more venues out there—many have an open house night or introductory workshops for the uninitiated.

Anyone who wants to keep up with the tech scene should bookmark Technically Philly. The site is fairly relentless in documenting all the events and news that involve local startups and tech projects.

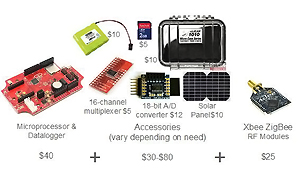
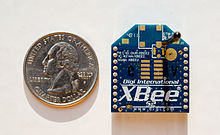
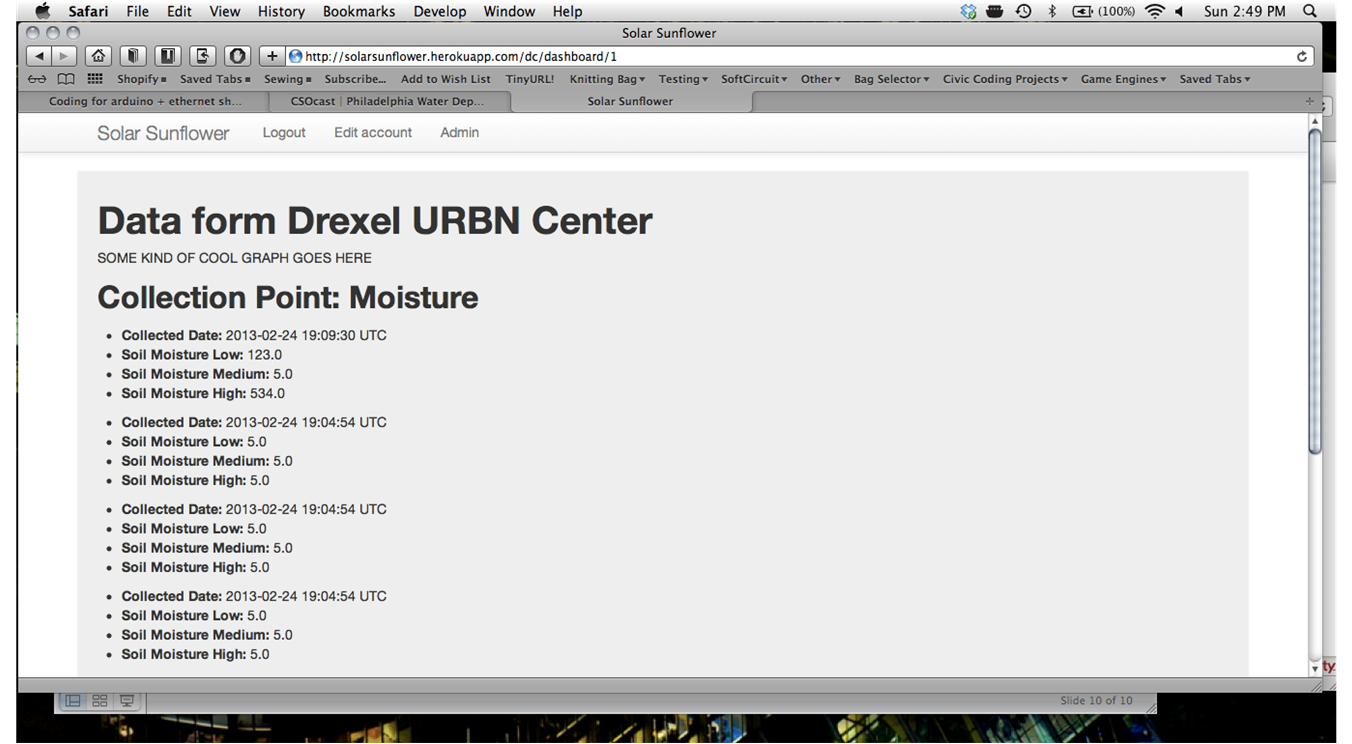
But as mentioned before, there’s a hackathon coming up: The AT&T EduTech hackathon at Temple University on April 6. We’ve smoothed out the kinks in our code and have the Arduino posting sensor data to the website. On the wish list is a multi-line graph to plot the data in real time on the site.

22 Mar

Stroud Shout-Out

Better late than never, a large amount of inspiration for the Solar Sunflower project came from the Stroud Water Research Center, particularly this web page.

stroud_imageImage: Stroud Water Research Center

The image above from Stroud’s website illustrates just how far open-source consumer electronics have come; for a couple hundred dollars, you can build your own sensor network. This is something that was previously off-limits to most civic and non-profit groups—the commercial alternatives cost thousands of dollars. The freedom (literally) afforded by the low cost of these electronic components is important. Sometimes you only want to monitor for a short period of time. Sometimes you have no idea how a sensor will work until you try it out in the field. Sometimes you’ll need to customize your monitoring setup. Arduino and other similar microcontrollers are modular: Switch out the sensors, change the way you power them, try, fail, and try again.

Also worth shouting out is dontflush.me, another fascinating water-related project using real-time low-cost sensors. Arduino-powered sensors detect when a combined sewer overflow is occurring in New York City and lets viewers of the website know not to flush a toilet during these overflow events. (The logic is that flushing a toilet during an overflow would contribute more sewage to the overflow.)

07 Mar

Radio vs. WiFi

xbee        vs. wifi_shield

Pictured above, two ways to skin a cat. Or, in our case, two ways to transmit data from a sensor in the ground to a computer in the classroom. On the left is an XBee, a small radio that attaches to an Arduino via a shield; two XBees can send/receive data. On the right is the Arduino WiFi shield, which connects to the Arduino and sends data via an available WiFi network. After running into a little bit of frustration* with the WiFi shield at this week’s Code For Philly meetup, our group started talking about some of the fundamental decisions we made about data transmission. Below are some pros/cons for using an XBee (or a Wixel, or some other similar radio device) versus a WiFi shield. For the record, the cost is similar—a WiFi shield is $85, two XBees and its shield are around $75.

The nice thing about XBees is that they can be used anywhere. They don’t need access to a wifi network. You can also use multiple XBees to make a mesh network if, say, the rain garden is a good distance away from the school. (The book Building Wireless Sensor Networks by Robert Faludi is a bible in this regard.) On the other hand, weather—especially storms, when we most want to see the data—may affect the transmission. And XBees must be used in pairs, which means an XBee must sit inside a classroom, attached to a computer, to listen for incoming data. We realize that not every classroom has a spare laptop to dedicate to receiving a radio signal. With XBee, there are two legs to the journey from sensor to Web: data transmitted to a computer via radio, then data transmitted from the computer to the server via WiFi (or Ethernet or however that computer connects to the Internet).

Just thinking about the WiFi shield makes me sad that Philadelphia’s dream of the ’00s—a citywide WiFi network—never came to fruition. Accessing a school’s WiFi network is no small feat; the School District’s IT department has to be on board with the initiative (luckily, Philadelphia’s School District IT people have been amazingly supportive of a pilot project). A WiFi shield requires no equipment to be housed inside a classroom, and there’s something attractive about a product that’s a single object, that takes care of business all by itself. Plus, WiFi just seems like … the future. Going forward, there will only be more WiFi access. So we’re sticking with the WiFi shield and will work out the error messages; it provides the most direct link to the Web.

And just as an aside, we’re not married to Arduino over here. There are other boards out there—more of them every week, it seems—that control sensors, connect to the Web, etc. We’re keeping an eye on what’s being developed. Behold, for example, the BeagleBone. Seriously, who names these things?

* “ERROR WEBrick::HTTPStatus::LengthRequired,” if you’re curious.

06 Mar

Ex Post Hackathon Facto

Is my Latin wrong? Missing from the previous post about the TechCamp hackathon were some of the details about our progress and what the next steps are. So here’s what we did:

  • Programmed and wired the Arduino to read 3 sensor values
  • Packaged data as JSON
  • Created a database to handle the data
  • Created a website to display the data
  • Stiff-armed the Drexel proxy server
  • Began testing the Arduino-Ethernet connection

At the conclusion of TechCamp, the website looked like this (no time for spellcheck, btw):

As you can see, it’s just a skeletal version of a website. The important thing is the transmission of the data values. But we came away with a definite to-do list:

Improve Functionality:

  • Sleep mode to conserve battery
  • Average sensor values to discard noise
  • Store data to send later when wifi becomes unavailable
  • Calibrate sensors to specific soil types
  • Refine web interface to include real-time graphs
  • Create a wifi connection using the Wifi shield

Construct the housing and sunflower:

  • Waterproof plastic case for electronics
  • If using PVC, may need to sand blast for painting
  • Determine optimal height, placement, way to secure the sunflower in the garden