13 Sep

Big Changes

Where hardware for this project is concerned, everything has changed. We’re saying goodbye to the Arduino Uno, the WiFi shield, and the Solar Sunflower. Here’s why: The Arduino and WiFi shield setup consumes too much battery power, and we all pretty much agreed that having to change batteries more frequently than every 3 months would be unacceptable. Might there be a workaround for this? Sure—but electrical circuits aren’t our strong suit, and making that part of the design takes away from our desire for this to be a project that anyone can build themselves.

Speaking of strong suits and DIY building, we’re getting out of the sunflower business. The thought of mass-producing sunflower-shaped sensors isn’t particularly appealing. Who better to design the sensor housing than the students themselves? A student design competition for the sensor housing makes more sense, appeals to wider interests, allows for modularity in design and installation, and lets students create something unique to their classroom and their school. For the moment, we’re still calling our project group Solar Sunflower, but a re-branding is in process. So, cheers to the giant sunflower: It was a fine symbol for our work, it never failed to attract attention when you walked into a room with it, and it was the ultimate conversation starter on elevators and street corners.

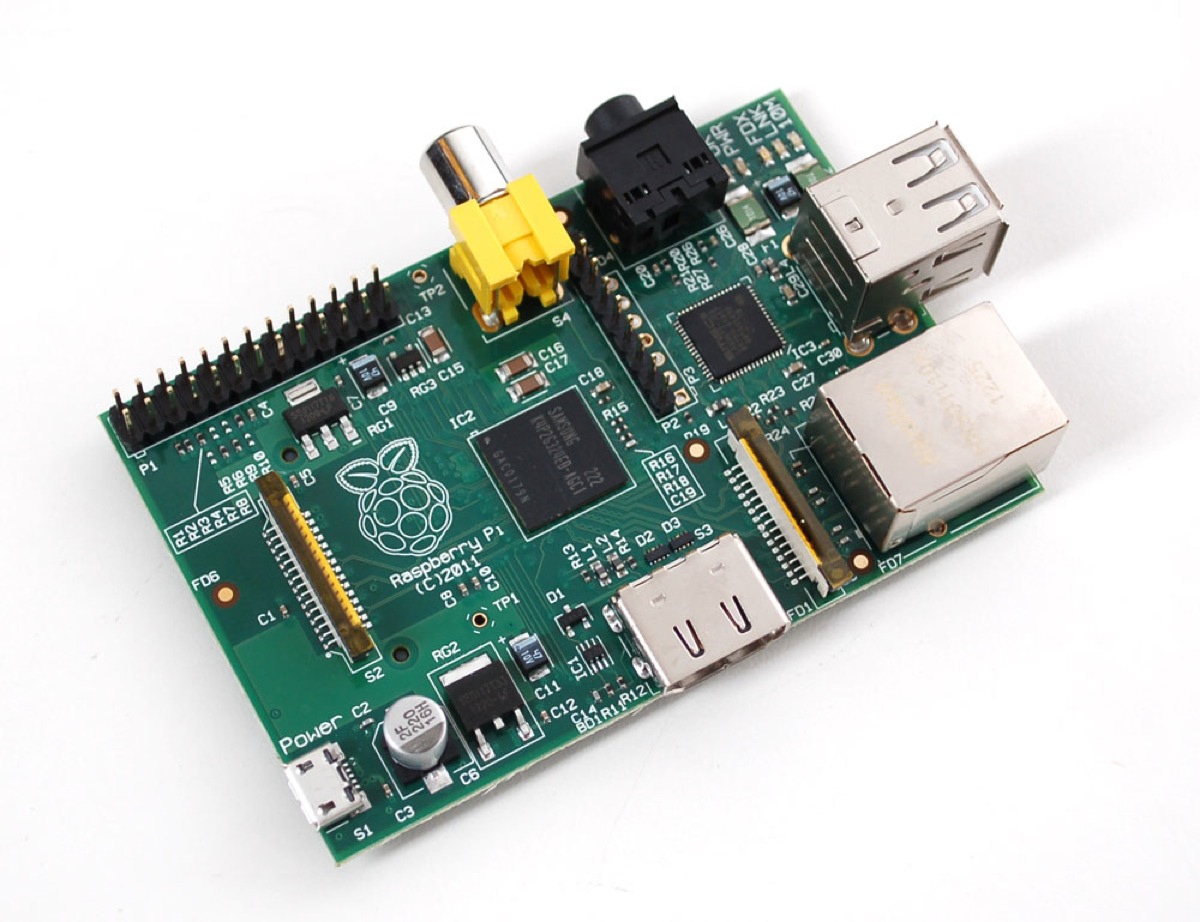
But we have something new to talk about—meet the Raspberry Pi:

RPi_modelb

It’s a $35, credit card-sized Linux computer. Linux is an operating system, or OS—Mac and Windows are examples of operating systems, but they are proprietary; Linux, on the other hand, is open source (you can get under the hood and modify it) and it is free to install. Don’t be afraid of Linux—it can look and perform like your Mac or PC, with a desktop, software programs, Internet browser, and solitaire (or minesweeper if you prefer). You can connect a mouse, keyboard and monitor to the Raspberry Pi and have a functioning computer workstation. It accommodates Ethernet or WiFi for Internet access, a high-resolution camera, and audio speakers. The Raspberry Pi is so inexpensive because it was developed in England to teach computer science. You can read more about it here.

When we combine a Raspberry Pi with the JeeNodes mentioned in the previous post, something incredible happens. Many of our nagging problems and difficulties disappear. With the JeeNode in the garden, we’re using less power from the battery pack. By sending sensor data over radio waves, we don’t have to worry about having WiFi access outside the school. The Raspberry Pi can sit inside the school, receive the data, and upload it to the web. We’re no longer tying up a computer in the school. We’re even reducing the overall cost of the project.

More details on this new configuration to come, but Jeelabs’ Dive Into JeeNodes series of blog posts is a rough guide to the approach we’re taking. Our paths diverge a bit around step 8, but the idea is the same: JeeNodes communicating with each other by radio, and the Raspberry Pi uploading data to a server.

We’re also saying goodbye to Drexel student Tommy Thompson, whose co-op position at the Philadelphia Water Department is ending this week. Many thanks to Tommy for all his hard work and hours of troubleshooting hardware and software. Tommy isn’t a computer science major, but I’m especially proud that he’ll be leaving here with some programming skills in C++ and Python. One day he programmed a game of Pong onto an LED display using the Arduino and a soil moisture sensor as a game control. That was pretty awesome.

09 Aug

A Good Schematic Is Worth a Thousand Blog Posts

sunflower_sketch

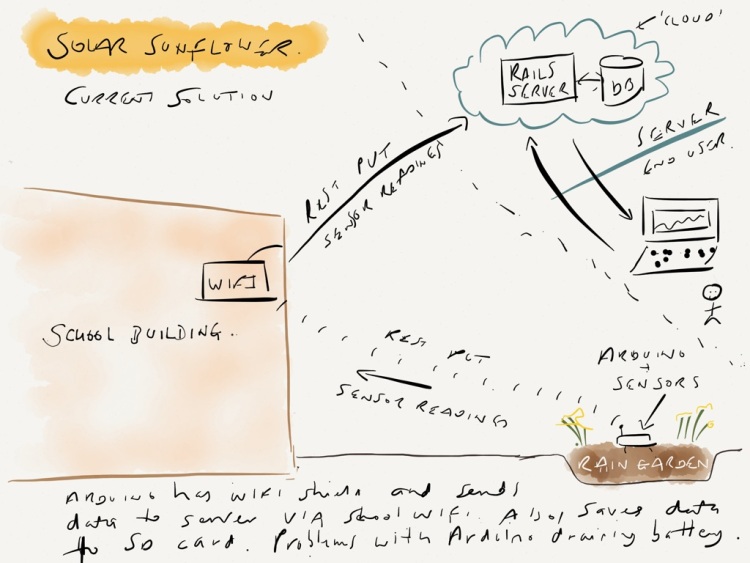
Thanks to our new team member James Tyack for illustrating our green school sensor configuration. This was a quick sketch he made, so I’m not going to complain about the penmanship. (But c’mon James, really.) In case you’re looking for further illumination, we’re looking at the Arduino with WiFi shield sitting in the rain garden transmitting sensor data via the school’s WiFi network. (The Arduino also records sensor data to an SD memory card as a backup.) The sensor readings are sent to a Ruby on Rails server with a database, and displayed on a website.

12 Jun

Lies We Told About Solar Power

usbdcsolarchargeruse_MED

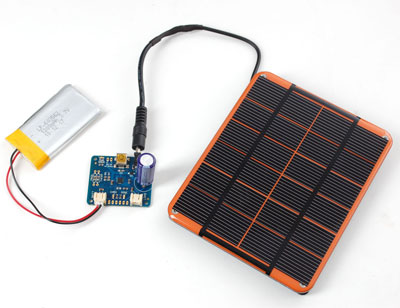
It’s time to come clean about the “solar” part of the Solar Sunflower—it isn’t happening right now. As it stands, a 9-volt battery powers the Arduino inside the sunflower’s head. There are practical reasons why the solar portion of the project is still under development: It isn’t convenient to rely on solar power when doing an indoor demonstration, and the sunflower design would likely place the solar panel over the top of the electronics in the head, making it difficult to disassemble when needed.

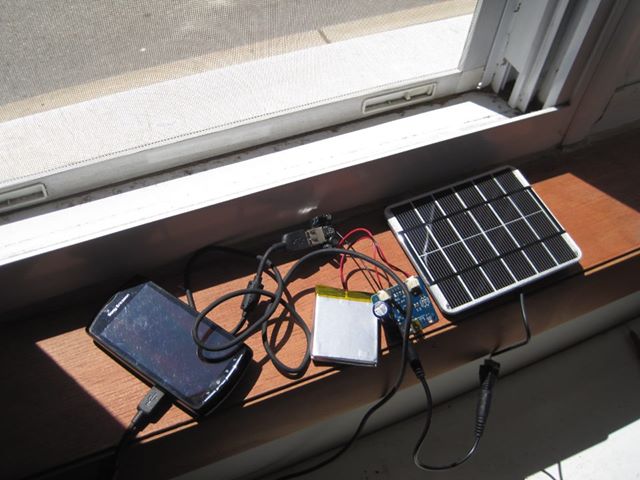
But mostly, we need to do a lot more legwork and research. Adafruit sells the components to make a solar charger that powers a Lithium ion battery (pictured above) and has a terrific tutorial on how to assemble it. Will it provide enough power for the Arduino WiFi shield, which operates at 5 volts? Will it be reliable, especially at low light levels during a storm? I assembled the solar charger at home and used it to charge my cell phone:

solarcharger

Only in direct sunlight did I get the voltage needed to charge the phone. It’s worth testing with the sunflower setup, but more research is needed across the board with regard to powering the sensors. We’ll do that right after I clean my windowsill.

26 Apr

Philly Tech Week 2013

20130425_inq_gelles25-bImage: Philadelphia Inquirer

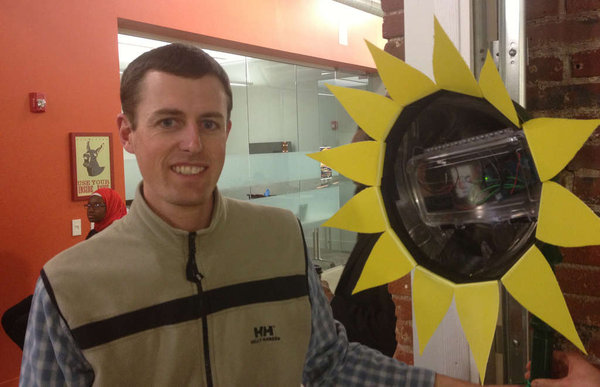
That’s my co-worker, PWD engineer Chris Bergerson, at the Switch Philly event this week. He got his picture in the newspaper because he happened to be standing near the sunflower at some point. Nice job, Chris. (But for real, thanks to Chris and Tommy Thompson for helping out.) This photo shows the head of the sunflower a little bit better—the Arduino and battery pack are inside a waterproof plastic snap case, with a hole drilled in the back for the sensor wires. We didn’t put a covering over the electronics, because we wanted them to be visible for now. (It also makes it easier to access.)

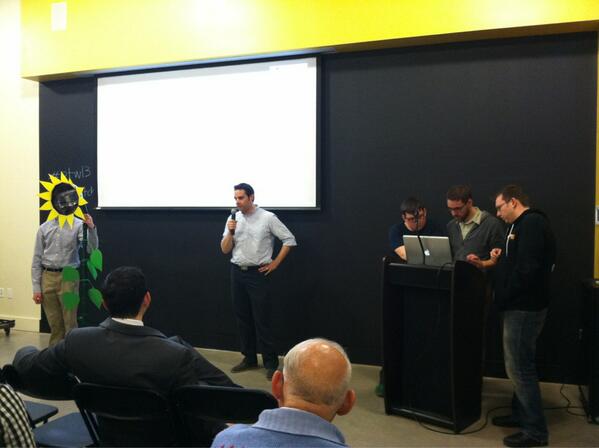
Chris Nies, Kevin Clough, Jason Blanchard and I did a five-minute presentation and complete demo of the Solar Sunflower. We put the sunflower in a bucket of soil, poured some water into the bucket, and watched (apprehensively—soil moisture is not the most dynamic thing in the world) as the website updated data values in real time. A total success, and we took second place in the competition. Congratulations to the winning team (Temple MESA), a group of students who devised a tutoring application. Here’s some more coverage on Technically Philly.

Here we are at Switch Philly, with the sunflower doing a total eclipse of Tommy’s head.

PhillyTechWeek

19 Apr

Solar Sunflower Comes Alive!

OLYMPUS DIGITAL CAMERA

It’s alive!

It’s not really alive. But it has been built—just in time for next week’s demo at Philly Tech Week. The sunflower was built with the generous assistance of PWD aquatic biologist Jay Cruz and Drexel University student Tommy Thompson, who’s currently a co-op with our Watershed Sciences group. It’s heavy; it’s mostly made from repurposed metal pipes we had lying around in a PWD garage. We originally thought it might be made of PVC, but we already had the pipe, and PVC is difficult to paint (it requires roughing up the surface so the paint sticks). Let’s have a look at the construction:

sunflower_construction

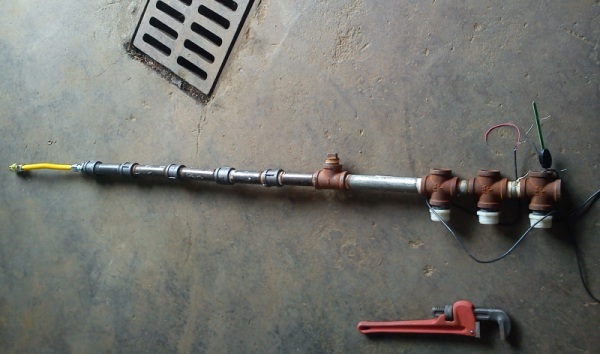
Pipe sections and pipe fittings were assembled, with three cross fittings on the bottom for the three soil moisture sensors. The yellow cable at the top is a flexible gas hose from Home Depot, the kind that attaches to the back of a gas stove.

sunflower_roots

A closer look at the “roots.” The wires from the sensors thread up through the pipe/”stem.”

sunflower_drill

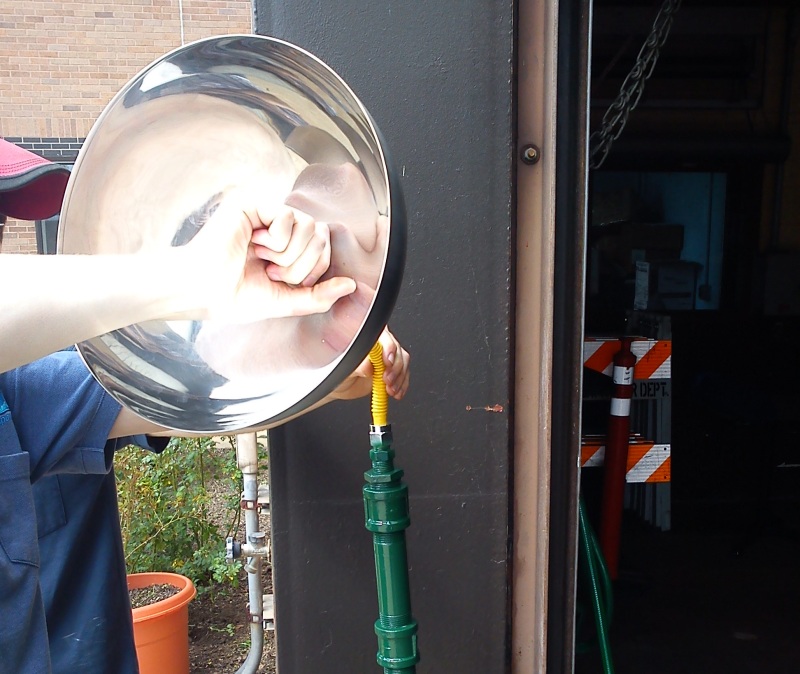
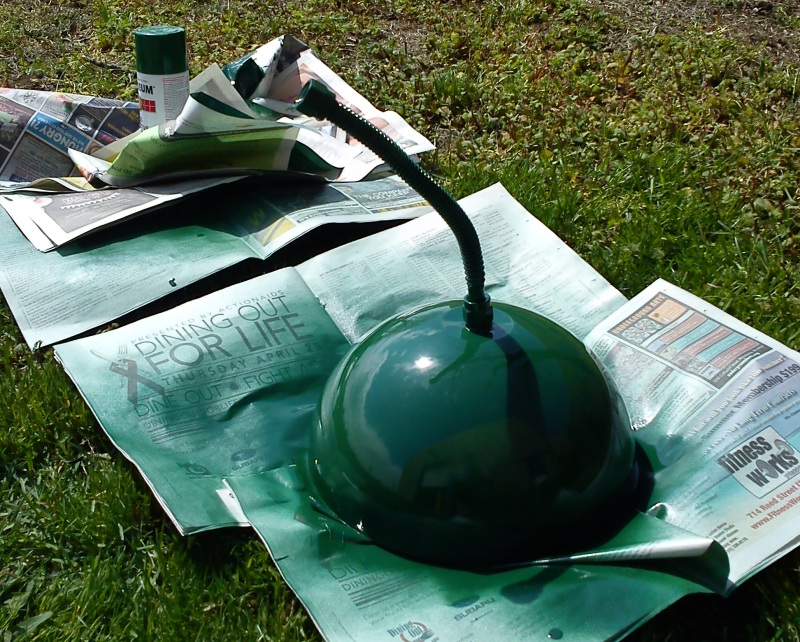
The head of the sunflower is a cheap mixing bowl from IKEA, drilled through the center to attach it to the flexible gas hose.

sunflower_head

A threaded gas connector holds the head in place. The tubing is a little too flexible; the head droops a bit but it can easily be stabilized with some rigid wire (like a length of coat hanger) or a pipe section around the hose that acts as a sleeve.

sunflower_paint

A quick spray paint of the head and flexible gas hose.

sunflower_petals

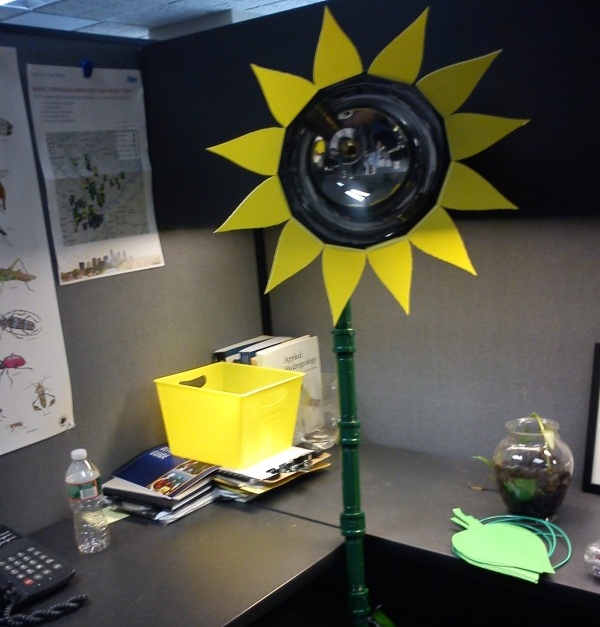
Found some yellow and green plastic containers at the dollar store; cut out petals and leaves from stencils; did battle with a hot glue gun. Arts and crafts is not our strong suit, but it’s presentable enough. Here’s the sunflower in my cubicle, freaking people out.

12 Apr

Web Display Mockup

phillywatersheds_screenshot

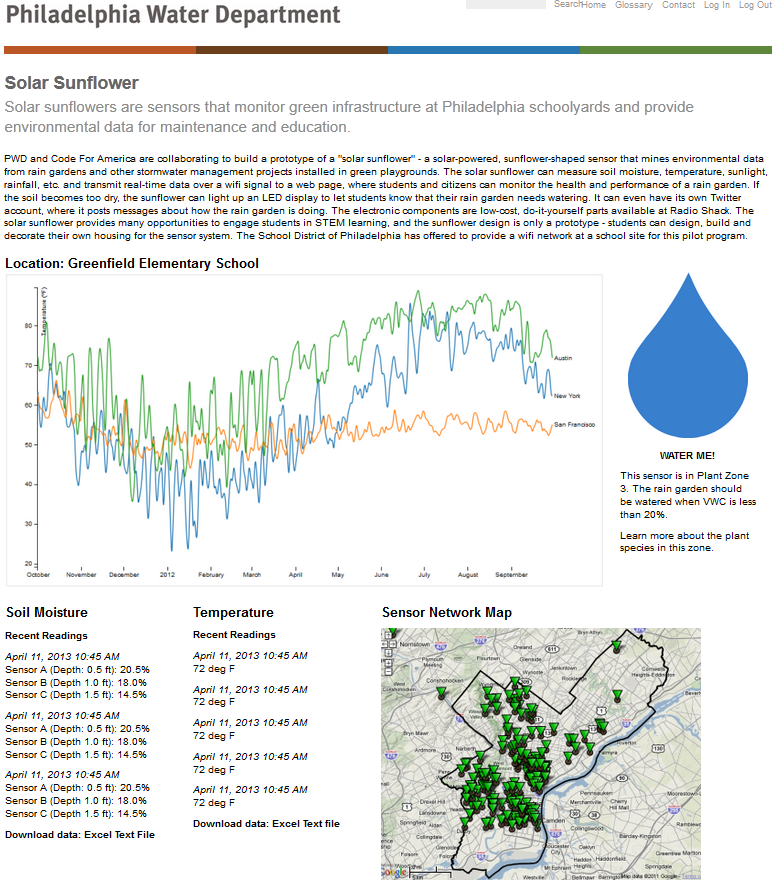
Here’s a quick mockup of a web page displaying data from the Solar Sunflower—none of this represents real data. It helps to visualize what the end product looks like, where the site lives (this presents it as a page on phillywatersheds.org, a Philadelphia Water Department website), and what features we want. Let’s break down what we’ve got so far:

  • A multi-line graph that’s updated in real time with soil moisture sensor values. Three data series, three soil moisture sensors. This sample image was generated using Javascript D3, a really powerful graphing library.
  • A “water me!” graphic. This could be something as simple as an image swap; when the soil sensors read below some threshold value for moisture, a raindrop appears. When the value is above the threshold, a green leaf is shown.
  • A map of locations of all the sensors. Although we’re only dealing with two sites at the moment (Greenfield and Nebinger Elementary schools), hopefully there will be a growing network of schools involved. By encoding latitude and longitude of each school, we can click on a point on the map and call up that school’s current data.
  • And finally, downloadable text or Excel files of the data. This doesn’t sound too exciting, but I think it’s where the in-depth educational value lies. Creating plots, correlating data, identifying trends, and analyzing statistics all rely on access to this raw data.
10 Apr

AT&T EduTech Hackathon

edutech_hackathon
Image: Technically Philly

This weekend, the Solar Sunflower project was selected as one of 5 finalists to advance to the Switch Philly event on April 23 and compete for a $5,000 prize. The field was narrowed down at the AT&T EduTech hackathon at Temple University on Saturday. Like TechCamp, the hackathon (organized by AT&T, Jarvus, Technically Philly and Temple’s Urban Apps and Maps Studio) focused on using technology to improve education. Some of the other projects included a mobile app that helps students find the safest walking route to school; a game app that uses a fantasy-football approach to tracking learning progress; and an app that connects students with tutors.

Not all our team was there, but Chris Nies and I were able to present a working demo of real-time sensor data being posted to the web in front of an audience and a panel of judges. It sounds pretty rosy in hindsight, but to be honest we spent hours just trying to send data via Temple’s WiFi network; these things happen. Thanks to Jarvus’ Chris Alfano and Technically Philly’s Brian James Kirk for their support and encouragement.

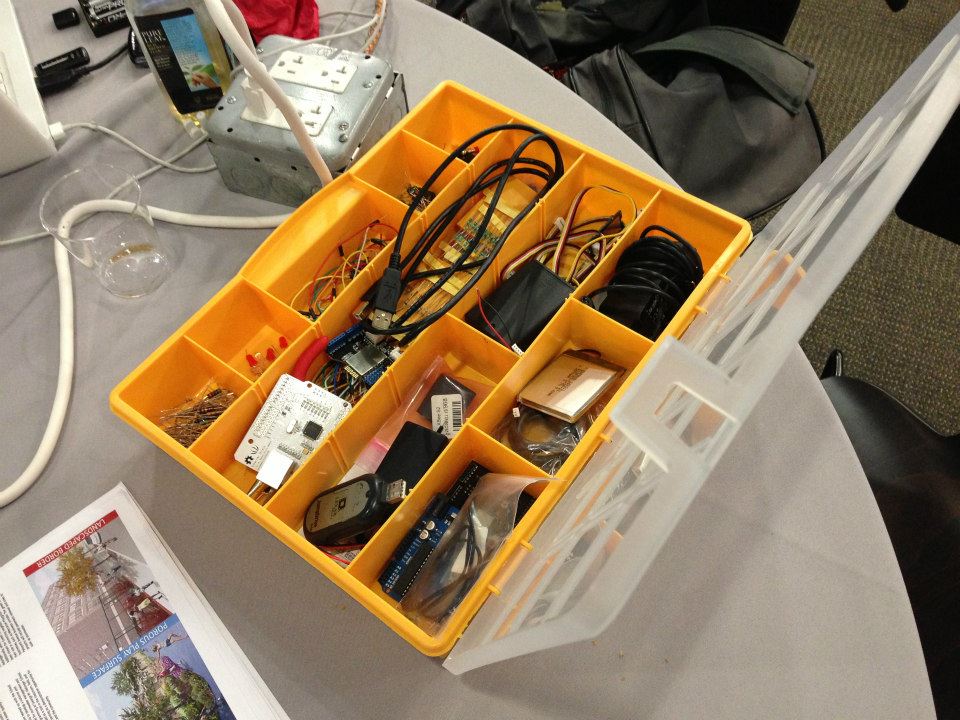
Here’s Technically Philly’s coverage of the event. We stole their photo of our box of Arduino stuff, above.

06 Mar

Ex Post Hackathon Facto

Is my Latin wrong? Missing from the previous post about the TechCamp hackathon were some of the details about our progress and what the next steps are. So here’s what we did:

  • Programmed and wired the Arduino to read 3 sensor values
  • Packaged data as JSON
  • Created a database to handle the data
  • Created a website to display the data
  • Stiff-armed the Drexel proxy server
  • Began testing the Arduino-Ethernet connection

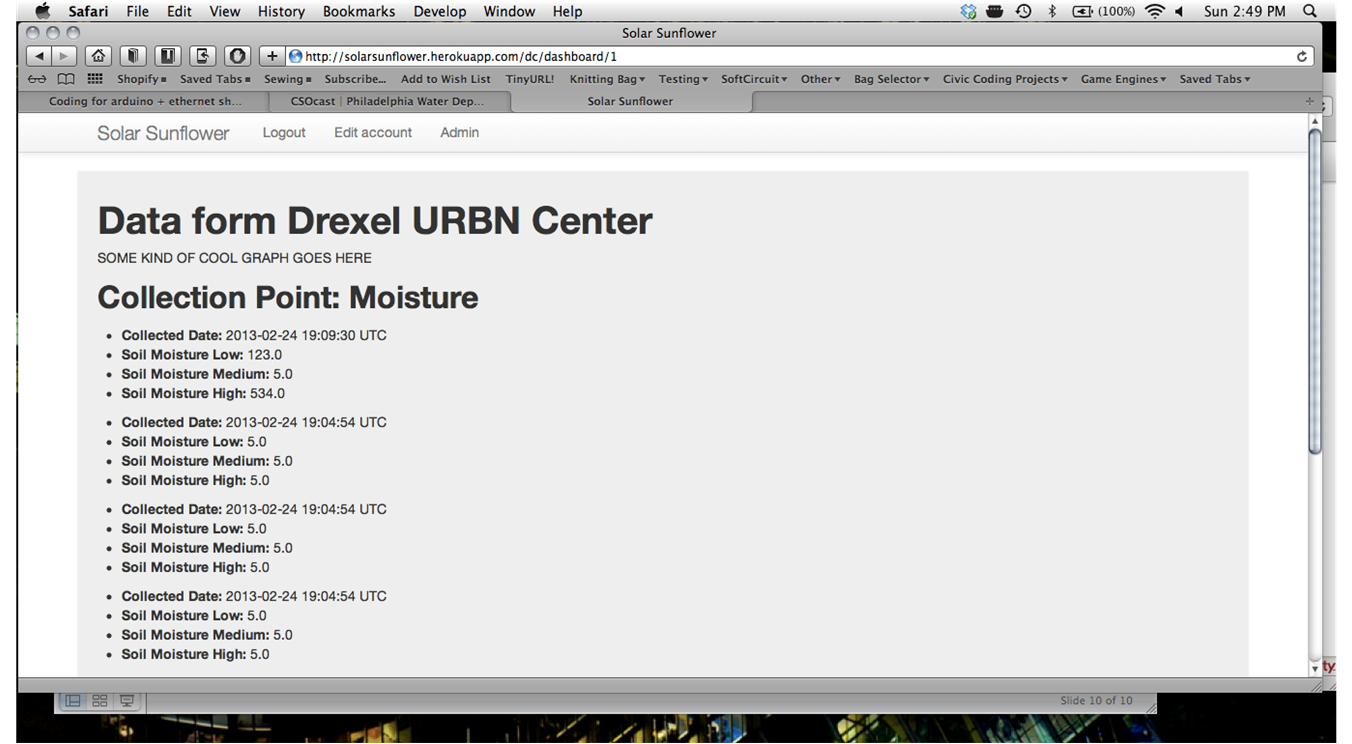
At the conclusion of TechCamp, the website looked like this (no time for spellcheck, btw):

As you can see, it’s just a skeletal version of a website. The important thing is the transmission of the data values. But we came away with a definite to-do list:

Improve Functionality:

  • Sleep mode to conserve battery
  • Average sensor values to discard noise
  • Store data to send later when wifi becomes unavailable
  • Calibrate sensors to specific soil types
  • Refine web interface to include real-time graphs
  • Create a wifi connection using the Wifi shield

Construct the housing and sunflower:

  • Waterproof plastic case for electronics
  • If using PVC, may need to sand blast for painting
  • Determine optimal height, placement, way to secure the sunflower in the garden
25 Feb

TechCamp Philadelphia

techcampheaderWhat just happened? This weekend, the sensor project idea got picked up at a hackathon, gained a whole team of technologists, and is on its way to wirelessly transmitting data to a website with a fully functional database. My first hackathon was a blur of activity, and that’s probably an apt working definition of a hackathon. But for accuracy’s sake, here’s the background on this weekend’s event:

TechCamp is a U.S. State Department program that connects technologists (I don’t like this word, btw) to people who are trying to solve social problems. Many of the previous TechCamps took place in cities in developing countries, and as far as I’m aware this is the first domestic event. It’s a sign of the times: Co-sponsored by the School District of Philadelphia and Technically Philly, this hackathon focuses on our city’s public schools and finding ways to use technology to improve education and administration. The two-day hackathon—the part where programmers and software developers work on a project, such as a mobile app for students—was only one element of TechCamp, but it was the part that enabled the Solar Sunflower project to grow some legs.

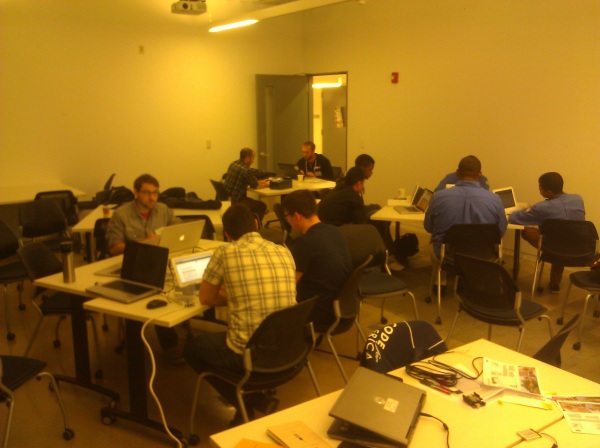
In democratic fashion, the hackathon at Drexel University’s URBN Center began with people contributing project ideas to a whiteboard; groups formed based on interest and requisite skill sets. (Special thanks to Paul Fugazzotto, from PWD public affairs, for attending the first day and helping to generate interest for the sunflower.) I was lucky to get hooked up with three really talented programmers: Christopher Nies, a Python developer; and Kevin Clough and Jason Blanchard, both of whom do development with Ruby on Rails (more on that shortly). Here’s some of our team working in the foreground this weekend:

TechCamp_hackathon

After I explained the project and gave some background information, Chris, Kevin and Jason had a plan of attack in place within minutes: We’re going to send JSON packets containing sensor data over wifi from the Arduino to a Ruby on Rails application running on Heroku. You got that, right?

Let’s try that again. The Arduino is going to hook up to a wireless network. In our case, it would be the school’s network (special thanks to School District of Philadelphia IT personnel—Melanie Harris, Phil Ichinaga, Sam Garst—for their support of the project). It’s going to send sensor values in a data structure called JSON, which stands for JavaScript Object Notation. JSON is kind of like the envelope that holds a letter: It is code that encloses the data in a simple, lightweight wrapper that is human-readable and easy to work with. Inside the JSON code you might specify the location of the sensor (site name), an ID for each sensor (soil sensor 1, soil sensor 2, etc.), the actual data value, maybe even a timestamp. The server is then configured to receive the data so it knows what to expect from the packet.

Now the most difficult part (for me, at least): Ruby on Rails. Ruby is a programming language, like Python or PHP or C++. Rails, on the other hand, requires a little more explanation. It is a web application framework that runs on Ruby. Oh right, a “web application framework.” I’m sure the finer points of Rails will reveal themselves in time, but for now I’m satisfied to know that it provides a way to build websites quickly, using less code than other approaches. (Full disclosure: Although I do consider myself a novice at programming, I have experience with HTML, CSS and other website-related things.)

Heroku is a cloud hosting platform. It’s a place to put a website. It’s free, up to a certain point of usage. This makes it a smart choice for projects under development.

Most of the progress made during the hackathon involved getting the server and website set up, programming the Arduino to talk to the server, and wiring up the sensors. Throughout, we had many people—educators, scientists, students—stop by our table to learn about the project. While I mainly preached the gospel about green infrastructure and stormwater management to our many visitors, Kevin, Chris and Jason did the heavy lifting on the tech side. Here’s a shot of our setup:

TechCamp desk

In the photo above, we have three soil moisture sensors wired to a breadboard (a plug-in board that lets you connect circuits without soldering wires) and connected to a Bluetooth shield. We ended up not using Bluetooth to transmit data; to the right of the breadboard is an Arduino and Ethernet shield that provides a better way to connect to the web. (Connecting via wifi is on the to-do list; we just wanted to test our connections to the server and Heroku site.)

Even though I arrived with a duffel bag full of electronics—Arduinos, sensors, breadboards, cables—at one point I had to steal away to Radio Shack to buy the Ethernet shield for the Arduino. It cost around $20. Now, I’ve become a semi-regular customer at various local Radio Shacks since embarking on this project, and I’ve never underestimated the base-level weirdness of the Shack’s clientele. But this time was special: A lady, perhaps thinking I worked at the store, asked me which digital converter box would scramble signals from her TV … because the people from the TV were accessing her brain and stealing her thoughts.

But I digress. Our team wasn’t able to do a live demo of the sensors transmitting data to the web, but we gave a solid closing-night presentation in front of a great audience of educators and the tech community. Best of all, the team resolved to keep working on the project, and we’ll get together at Code For Philly meetups in the future. More than anything, I was astonished at the level of interest and support for this project and hope to keep the momentum going.

11 Feb

Solar Sunflower Sensor

sunflower_full   
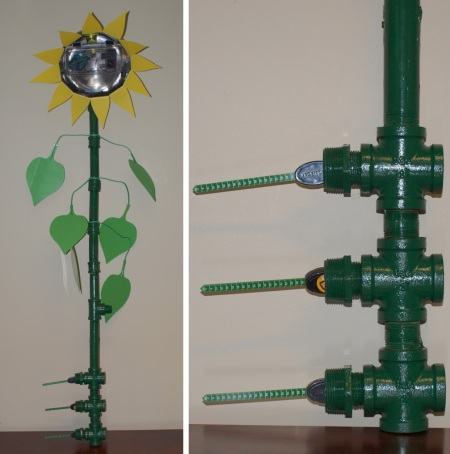
Until now, we’ve been fairly vague about labeling this “Arduino project” or “GSI sensor project.” Truth is, we didn’t have a concrete idea of what a final product might look like, or even all the things it might do. Jason Cruz, an aquatic biologist at PWD, used Sketchup to create a schematic of a sunflower-shaped soil-moisture sensor (that’s a lot of alliteration). The image above shows the basic structure—a smart and fitting design that places three soil moisture sensors underground at increasing depths, much like the roots of a plant. (We’ll discuss soil moisture sensors in more detail at some point, but the ones pictured here are Vegetronix probes.)

sunflower roots

The wires from the moisture sensors run up through the stalk/conduit to the head of the sunflower, a repurposed mixing bowl or lamp head that will house the electronics (Arduino, battery, maybe a WiFi or radio device to transmit the data). This housing would be waterproofed, of course, inside a plastic case.

sunflower_head

Ideally, we’d be able to run the entire thing off solar power. A solar panel could charge a Lithium-ion battery (a setup similar to this one, but sized appropriately for our voltage needs), and if the head of the sunflower could swivel, we could optimize exposure to sunlight.

sunflower head

Jason’s design set off a host of new ideas and transformed an electronics project into an art project. Picture the sunflower in a rain garden at an elementary school, where students can use it to monitor soil moisture and water their plants when the soil is too dry. What if there was a do-it-yourself sunflower kit that students can build, decorate, and install themselves? What about a student design competition for the sensor housing? The Solar Sunflower would be a powerful tool for both GSI monitoring and STEM (science, technology, engineering, math) education.