17 Nov

Sensors Working Overtime

fi_soldering

Back in June, greenSTEM helped students install web-connected soil moisture sensors at the Penn Alexander school and the Franklin Institute. These Soil Cell units were placed in garden beds and operate the same way as PWD’s other devices (which monitor green stormwater infrastructure), but with a slight difference: They use solar panels to keep the batteries charged. Over the last six months, these sensors have been virtually maintenance-free, requiring no battery changes.

Of course, we’re always making improvements. Above, SLA Beeber student Brandon soldered permanent connections from a soil moisture sensor and a thermistor (temperature sensor) to the circuit board. He’s also designed and built a post structure to elevate and mount the solar panel in an optimal position to receive sunlight and keep the Soil Cell charged. Installation is planned for the spring, and we’ll be exploring ways to do more with these sensor units that are constantly being charged. (Hint: The sensors are currently “talking” to us; what if we started talking to them?)

Check out the live soil and temperature data from the Franklin Institute’s ozone garden here.

02 Dec

Introducing: The Soil Cell

el_chapo

When we first deployed web-connected soil moisture sensors in 2013 (see: the Root Kit), the device relied on radio signals and a school’s wifi network to send data that students could access online. But what if there’s no wifi network to connect to? That limitation led us to investigate using a cellular network signal. This winter, we’re putting the finishing touches on the Soil Cell.

Check out our tutorial: It walks you through the hardware assembly, power-saving code, and the setup of a data endpoint at cloud service Ubidots. We use the Adafruit FONA module to connect to a 2G network; in the coming months, we expect there to be multiple boards that are compatible with the 3G network. (That means there will be even more places where the Soil Cell can connect and send data.) We’ll be updating the tutorial as new pieces come into place.

As we wind down 2015, it’s worth noting that Internet of Things technology (web-connected sensors, Arduinos, Raspberry Pis, etc.) is exploding. We’re shifting our Arduino code archive to Codebender and anxiously awaiting the $5 (!) Raspberry Pi Zero, the Particle Electron and the AirBoard—all due to appear in early 2016. These tools will make it easier than ever for students and citizen scientists to collect data and engage in new projects.

27 Apr

Thinking Outside of the (Cardboard) Box

Ninth grade students at Science Leadership Academy’s Beeber campus began the challenge this week of creating their own solar-powered, video-capturing, soil-moisture monitoring bird houses—and maybe even a few bat boxes. Each unit will be equipped with its own Arduino/Raspberry Pi  device that will harness the solar power and use WiFi to transmit soil-moisture data and a live “peep show” (get it, because they’re birds?) courtesy of the infrared camera, allowing students to observe the birds inside. As if all of the technical aspects weren’t enough to consider, the students also have to be aware of what kind of birds they’re building for, and choose their houses’ specifications accordingly.

So this week, in becoming aware of their tenants, the students crafted cardboard to scale models of their birds of choice with the help of Alex Gilliam, director of the organization Public Workshop (which collaborates with youths and their communities to help them shape the design of their cities through workshops and leadership programs). And check out the results!

Photo credit: Matthew Fritch

Here we have a few American Robins, a few House Sparrows, and one American Chickadee. Some students also scaled cardboard models of starlings, bluebirds, and bats.

Gilliam encouraged the students to account for both the size of their birds with their wings at their sides and fully spread. They’re each taped to a cardboard sheet inscribed with pertinent information—things like diet, preferred habitat, and how they prefer to nest.

Next week the students will start modeling cardboard prototypes of their birdhouses/bat boxes for their cardboard creatures in order to get the designs perfect for the final products.

16 Apr

Welcome to the Matrix

SLA_LED_plant

In our last post, we detailed how soil moisture sensors and datalogging are not exactly the cure for dead plants (or neglectful students). The next step at SLA Beeber was to give students blindingly bright visual cues as to when their plants required watering. Along with taking soil moisture readings and determining a wet or dry state, students programmed their own designs onto an Arduino-powered LED matrix. Remember Lite-Brite? It’s kind of like that, except it’s coded in Arduino using an x-y coordinate system, geometric shape commands and color codes. Students began by sketching their designs onto a 16×32 grid, then breaking the grid into rectangles, lines, and pixels as lines of code:

Feed_LED

Adafruit has an excellent tutorial on how to wire this to the Arduino and program it. We put the display inside a Pelican case to keep it dry and set it up in the school’s hallway, where one can only hope the plants’ occasional pleas for water will catch someone’s eye.

17 Mar

Green Sensor Design (and Terrible Gardening) at SLA Beeber

SLA_Arduino_2015  SLA_class_2015

At Science Leadership Academy’s Beeber campus in Overbrook, 9th grade students are learning to program Arduinos to collect soil moisture and sunlight data. The course began with a trip to the Fairmount Water Works to get some background on Philadelphia’s water history, its present challenges due to stormwater and combined sewer overflows, and the plan for an environmentally sustainable future. On the tech side, we’ve covered Arduino basics, Ohm’s Law, simple circuit design (in the photos above, Fritzing came in handy to help students visualize circuits), and the principles behind soil moisture sensors and photocells.

Each student used a datalogger shield to monitor a plant. Alas, monitoring does not equal maintenance. There’s only one bit of green in this otherwise barren dirt farm:

dirt_farm

In the coming weeks, we’ll figure out more attention-grabbing ways to make sure students are looking after the plants. (And perhaps a solution to that mess of wires.) Thanks to Drexel University’s ExCITe Center, whose Seed Project funding brought all the electronics and sensors into the classroom.

29 Jan

Concluding the Thrilling Saga: The Talking Plant

lego_audio_sensor

As the third and final part of our interactive plant display at the Fairmount Water Works, our last plant is now able to talk. That is, it can express its need for water through audio. This setup uses an Arduino ($25), a Wave Shield ($22), and a Vegetronix VH400 soil moisture sensor ($37). Our two 10th grade Science Leadership Academy students had a lot of fun soldering and building the shield. To our delight (and surprise), it actually worked the first time we tried it.

The audio shield will only play .wav files. There are databases with huge amounts of them out there on the Internet. We faced some issues with our .wav files and their compatibility with the device, but after some practice, we began to get the hang of it.

Currently, in an attempt to annoy the Water Works employees (just kidding), each hour the plant takes a moisture reading.  If the moisture level is satisfactory, it plays a clip of the song “Everything Is Awesome” from The Lego Movie, to go with the hardware’s awesome Lego case built by the SLA students:

If the moisture level is not satisfactory, it will play water droplet sounds, indicating it needs to be watered. There’s a lot of room for creativity here, because iTunes and Audacity can convert  .mp3 to .wav files.  What’s stopping Matt from recording himself, converting it, and uploading it to the Arduino? Nothing—he’s probably already started working on it.

View the code after the jump.

Read More

16 Jan

Even Plants are Tweeting Nowadays

Capture1

As part of our display at the Fairmount Water Works, one our plants will now be tweeting when it needs to be watered. (First the teenagers, now the plants?)

This setup uses an Arduino Uno ($25), a WiFi shield ($80), and a Vegetronix VH400 soil moisture sensor ($37). This WiFi shield has an integrated antenna, which allows us to connect to the wifi at the Water Works and send tweets over its network.

We didn’t want our plant to be someone who only talks to you when they need something, so we have a series of different tweets:

  • “Water me please!” when the moisture value falls below 250.
  • “URGENT! Water me!” when the moisture value falls below 150.
  • “Thank you for watering me!” when there is a change in moisture level of at least 100 and the new moisture value is above 250.
  • “You didn’t water me enough!” when there is a change in moisture level of at least 100 and the new moisture value is below 250.
  • “You overwatered me!” when the moisture level climbs to above 400.

One problem we ran into was that Twitter doesn’t allow repeated tweets, as a way to block spam.  Because of this, we had to add more content to our tweets.  In addition to the text, each tweet displays the moisture level and the tweet number (we added a tweet counter in our code).

You can see our plant’s tweets here.

View the code after the jump.

Read More

05 Jan

Bigger, Better and Brighter LED Display

IMG_6699 IMG_6696

Our previous post detailed the simple soil moisture sensor with an LCD display that has been keeping track of our plant’s watering needs at the Fairmount Water Works.  We decided the project could use a little more flair—plus, our original LCD display got a little wet.  Luckily, our new 16×32 LED Matrix has its own waterproof case. The setup uses an Arduino Uno ($25), a Grove base shield ($10), a Vegetronix VH400 soil moisture sensor ($37), and a 16×32 RBG LED matrix panel ($25). All of the electronics are safely tucked into a waterproof Pelican case.

We decided to display more information with our LED matrix.  Now, it will display the words “Water me!” when the soil moisture level falls below a voltage of 1.2, or “Don’t Water” when the moisture level is greater than 1.2 V. It then displays the voltage, followed by “Water Works,” and repeats.

We found that with RGB (red-blue-green) matrices like this one, certain colors require more power.  When using solely the power coming through the computer to the Arduino to power the matrix, we were limited to basic red, blue, and green colors.  Any other colors would be displayed as one of the tree.

We decided this was a little too boring, and experimented with supplying power from the wall directly to the matrix, in addition to the power coming from the wall to Arduino.  This got us very bright, vibrant colors. However, the LEDs were glitchy and flashing.  We think the matrix was getting just a little too much power, and it was distracting.  In the end, we stuck with the additional wall power, but used lower power colors.  This gave us the brightness we wanted, without all the flashing.

View the code after the jump.

Read More

08 Dec

Fairmount Water Works Sensor

Now on display at the Fairmount Water Works—a simple soil moisture sensor with an LCD display to keep track of a plant’s watering needs. This is just a first step in developing some really interesting ways to monitor plants and get feedback on plant health. Working with two 10th grade students at Science Leadership Academy, we’ll be investigating how to use visuals, audio, and Twitter to communicate environmental data.  (We’ll also be investigating why we didn’t put the electronics in a waterproof case, because what’s more awesome than an unprotected circuit board next to a plant that’s being watered?)

This setup uses an Arduino Uno ($25), a Grove base shield ($10), a Grove LCD display ($14) and a Vegetronix VH400 soil moisture sensor ($37, though you can find soil moisture sensors for under $10; we like the performance of the VH400). The Grove shield stacks on top of the Arduino and lets you use snap-in wires to connect sensors and displays. The Arduino code is after the jump; it’s basically modified code from the Grove website.

We did a rudimentary calibration of the soil moisture sensor and got readings for the sensor in air, in dry soil, in wet soil, and immersed in water. From those measurements, we estimated readings below 200 would probably indicate the plant needs watering. It’s not an exact science, but we’ll learn more about what the sensor output means as we go along.

Read More

18 Feb

Playing in Dirt: Soil Moisture Sensors

Resisting all impulses to make a “dry subject” joke with regard to soil moisture, let’s jump right in and look at the sensors below ground in our solar sunflower project. At this point, we’re planning to use Vegetronix VH400 soil moisture sensors (pictured below). We can’t directly measure soil moisture (well, it’s possible, but it involves disturbing the soil, drying it, and weighing it), but we can estimate the water content with dielectric sensors such as the Vegetronix.

vh400The basic idea is that wet soil conducts electricity better than dry soil. So we stick the sensor in the ground, have it emit an electromagnetic signal, and detect how well that signal is reflected back. Based on the amount of voltage detected by the sensor, it’s possible to estimate the volumetric water content (VWC) of the soil. VWC is simply the percentage of water in the soil—that is, it’s an overall percentage of water in the entire volume, which includes soil, water and air trapped between soil particles.

Of course, not all soil is the same. This complicates things—water drains through sand quickly, for example, but clay holds on to water—and can greatly affect the accuracy of the sensor readings. Calibration is the key to accurate soil data in this situation, and there’s really no way around it. The upside is that calibrating sensors (getting readings in dry soil, semi-dry soil, semi-wet soil, wet soil and constructing a curve based on those readings) is real science. It’s so real you won’t be able to stand it.

It should be mentioned that there are other ways to measure soil moisture besides the dielectric method described above. If you’re concerned about accuracy and have a lot of money, time-domain reflectometry (TDR) is for you. More realistically, for our application, you can also measure the soil tension, or how much suction is being exerted on the water in the soil. The Watermark 200ss soil moisture sensor (pictured below) measures soil tension. It contains two electrodes in a gypsum matrix. Water allows a current to move between the electrodes, and as the soil dries out, water leaves the sensor matrix and resistance between the electrodes increases.

watermarkWhy did we choose the Vegetronix over the Watermark? I see us asking that question again later on. Both sensors are affordable (a little under $40 each), which is a prime consideration here: We want to keep the cost of materials as low as possible, so that any school can obtain sensor equipment. The Watermark’s advantage is that it doesn’t care about soil type. However, it’s not great for sandy soils (such as we might find in a rain garden), and after some testing, the response time is not as fast; with the Vegetronix, you can grip it in your hand, and the sensor reacts to the moisture from your skin—it’s great for demonstration. The Watermark also takes some pre-wetting on installation and needs to be re-installed if it dries out completely. So it’s the Vegetronix for now, and the beauty of the Arduino is that we can change sensors at any time; it’s going to accommodate a wide variety of sensor types.

And now for the bad news: Soil moisture data is not inherently exciting. It is truly akin to watching paint dry—you see the volumetric water content spike during a storm or watering, then gradually decline until the next rain. So we’re going to need to make this more interesting. Adding a temperature sensor to the Arduino is easy; and we can grab rainfall and sunlight data from other websites (PAR sensors and rain gauges are a bit more difficult/expensive). Now we can correlate environmental data and see what typically happens during a storm: temperature drops, sunlight dims, rain falls, and soil moisture spikes.

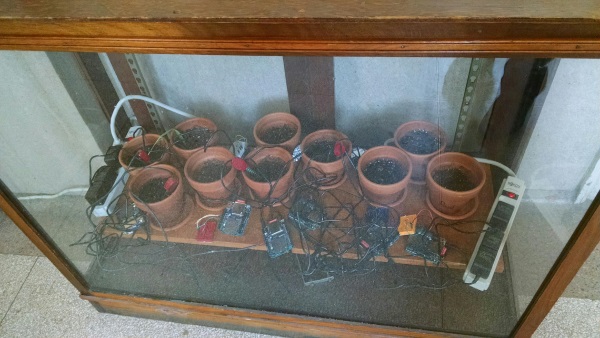
The last thing I wanted to mention about these soil moisture sensors (for now) is that the sunflower will have three of them at different depths: one in the root zone, and two more beneath. We should be able to see the water infiltrate through the soil profile during a storm if we take sensor readings frequently enough. We should be able to draw some conclusions about how well the rain garden is draining. And in some cases we may want to bury the sensors at different spatial locations rather than different depths to determine, for instance, whether parts of the rain garden are receiving water and parts of it are not.

Who loves soil moisture? Australians and farmers. Read an outstanding primer on soil moisture sensors here.