05 Dec

Re-branding: greenSTEM Network

greenSTEM logo sketch

Ever since we retired the Solar Sunflower name, we’ve been attempting to come up with a new handle for this project. Many pages and napkins have been scribbled with notes, drawings and words: green, schools, sensor, network, garden, STEM, system, soil, water, stormwater … nothing stuck.

Earlier this week, PWD aquatic biologist Jay Cruz dropped a piece of looseleaf paper on my desk (above); he came up with it while drawing with his daughter. It’s perfect: greenSTEM. We’re going with it, and we’re even going to use a modified version of the logo Jay drew, including the  CFL lightbulb—nice touch.

15 Nov

Re-branding: “Root Kit?! Not on my network, pal!”

root kit complete

This is our physical product. We are calling it a Root Kit. The Root Kit is a do-it-yourself environmental sensor kit for schools to be able to wirelessly monitor rain gardens and other vegetation in real time on the web. On the left is the data receiving unit; it sits inside the school and receives sensor data from the object on the right, the sending unit. It is contained in waterproof case and is equipped with a temperature sensor and three soil moisture sensors. The soil sensors get buried in the ground and almost act as roots. This is the Root Kit.

Now, tech-savvy people will howl at the name, because a “rootkit” is a dirty word among IT and network security professionals. You see, a rootkit is techspeak for malicious software that invades and attacks servers and computers. Tell a school district IT person that you’d like to install a Root Kit at the local elementary school, and you’d better be prepared to run.

We still like the name. Much like the term “hacker,” we want to turn the meaning of “rootkit” on its head and have a little fun with the terminology. So who wants a Root Kit?

01 Nov

8 Microamps

micro

Learning new technology has a way of making you feel both highly intelligent (such as when you realize you can install entire software packages by typing three words) and monumentally stupid, often in close proximity to each other. I’m not sure if our battery-power problems exactly fall into the latter category, but let’s just say that the solution was not obvious to me, even after reading countless posts on Arduino forums and looking at many lines of code.

To refresh your memory, our JeeNode (formerly Arduino) and sensors have been drawing too much current from the battery, effectively killing our rain garden monitor within days. Even when we put the JeeNode into sleep mode, which is the vast majority of the time (sensor readings are taken once every 30 minutes), there was a current draw. We weren’t truly shutting it down.

I talked it through with James Tyack, and it didn’t take him long to figure out a solution: The digital pins on the JeeNode can be set to output a voltage (power); you can also toggle a digital pin on and off (“high” or “low” in Arduino terminology), so it either delivers 0 volts or 3.3 volts. If we power the sensors from the digital pins instead of the “power” pin, we can completely shut down power to the sensors when readings aren’t being taken. It’s a simple idea that just escaped me entirely.

The result? Instead of drawing 10 milliamps when idle, the JeeNode and sensors now draw 8 microamps. Forget about days of battery life—it’s possible that three AA batteries can provide power to the sensor for years.

17 Oct

The JeeNodes Workshop is Kind of Creepy

solder_desk

Unlike the pre-fabricated Arduino boards we started out with, these JeeNodes don’t make themselves. They require soldering to attach the various components (resistors, capacitors, antenna, etc.) to the printed circuit board. It’s a skill you have to develop, but it’s not difficult; this video is one of my favorite tutorials on soldering electronics. I’ve come to enjoy soldering, and it’s come in handy (when my son’s toy lightsaber broke, I re-soldered the battery connection and restored balance to the Force). Now that we’re working with JeeNodes, I relocated all soldering operations to a desolate PWD garage—it can be a very Zen-like experience, and that’s my desktop setup above. But it’s also a little bit like a horror movie, because when you zoom out, you realize that I am working inside a cage.

solder_cage

20 Sep

Radio Hack

rf12_radio

Pictured above is the RFM 12B radio transceiver that sits on one end of a JeeNode. It is actually quite tiny—about the size of a fingernail. It’s extremely energy-efficient (every component that JeeLabs uses is mindful of power consumption) but it has a quirk: It sends data in binary packets, a seemingly confusing series of numbers in the range of 0 to 255 (read this for more info). That isn’t very convenient. We just want to see integers (24, for example) or floating point numbers (1.2, for example) representing our soil moisture and temperature data. Luckily, JeeLabs has some pointers on how to decode binary packets, but check out both the send and receive JeeNode codes on our GitHub page to see how it works in practice.

In other radio-related news, we did some range testing with the JeeNodes at Franklin Square to find out just how far away from each other they can be. The results were encouraging—we were successfully sending data from about 300 feet away with a line of sight, and nearly 200 feet with an obstruction in between (in our case, a building). If testing this at a park in Philadelphia named after Benjamin Franklin in any way connects us to the great inventor and the history of our city, well, that’s too much to even think about.

13 Sep

Big Changes

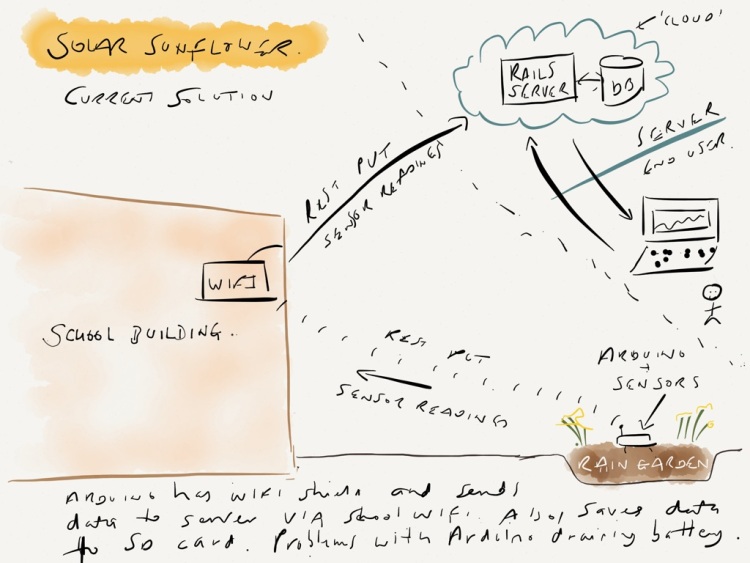
Where hardware for this project is concerned, everything has changed. We’re saying goodbye to the Arduino Uno, the WiFi shield, and the Solar Sunflower. Here’s why: The Arduino and WiFi shield setup consumes too much battery power, and we all pretty much agreed that having to change batteries more frequently than every 3 months would be unacceptable. Might there be a workaround for this? Sure—but electrical circuits aren’t our strong suit, and making that part of the design takes away from our desire for this to be a project that anyone can build themselves.

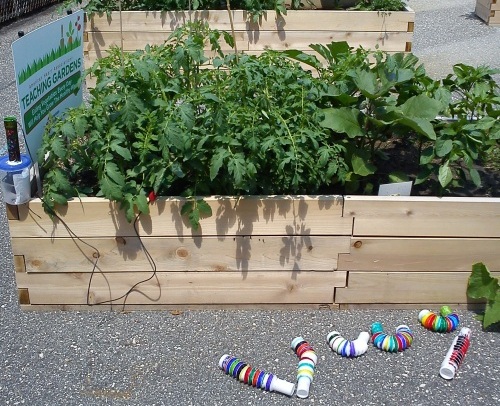
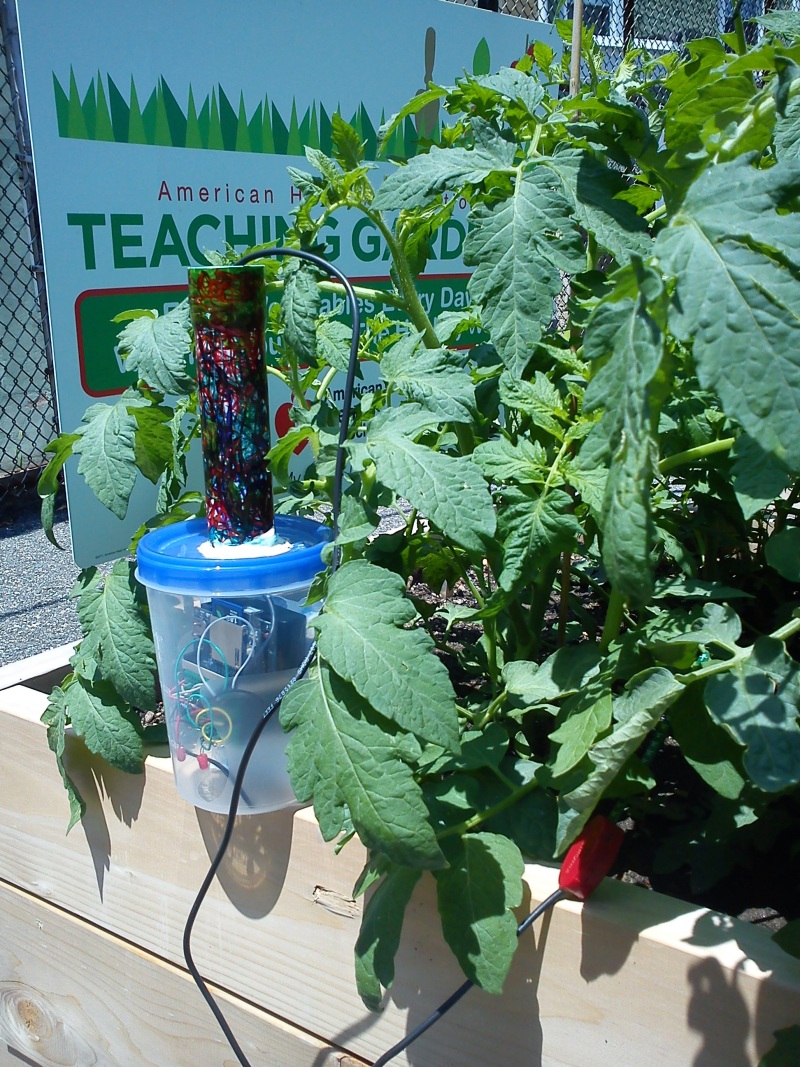
Speaking of strong suits and DIY building, we’re getting out of the sunflower business. The thought of mass-producing sunflower-shaped sensors isn’t particularly appealing. Who better to design the sensor housing than the students themselves? A student design competition for the sensor housing makes more sense, appeals to wider interests, allows for modularity in design and installation, and lets students create something unique to their classroom and their school. For the moment, we’re still calling our project group Solar Sunflower, but a re-branding is in process. So, cheers to the giant sunflower: It was a fine symbol for our work, it never failed to attract attention when you walked into a room with it, and it was the ultimate conversation starter on elevators and street corners.

But we have something new to talk about—meet the Raspberry Pi:

RPi_modelb

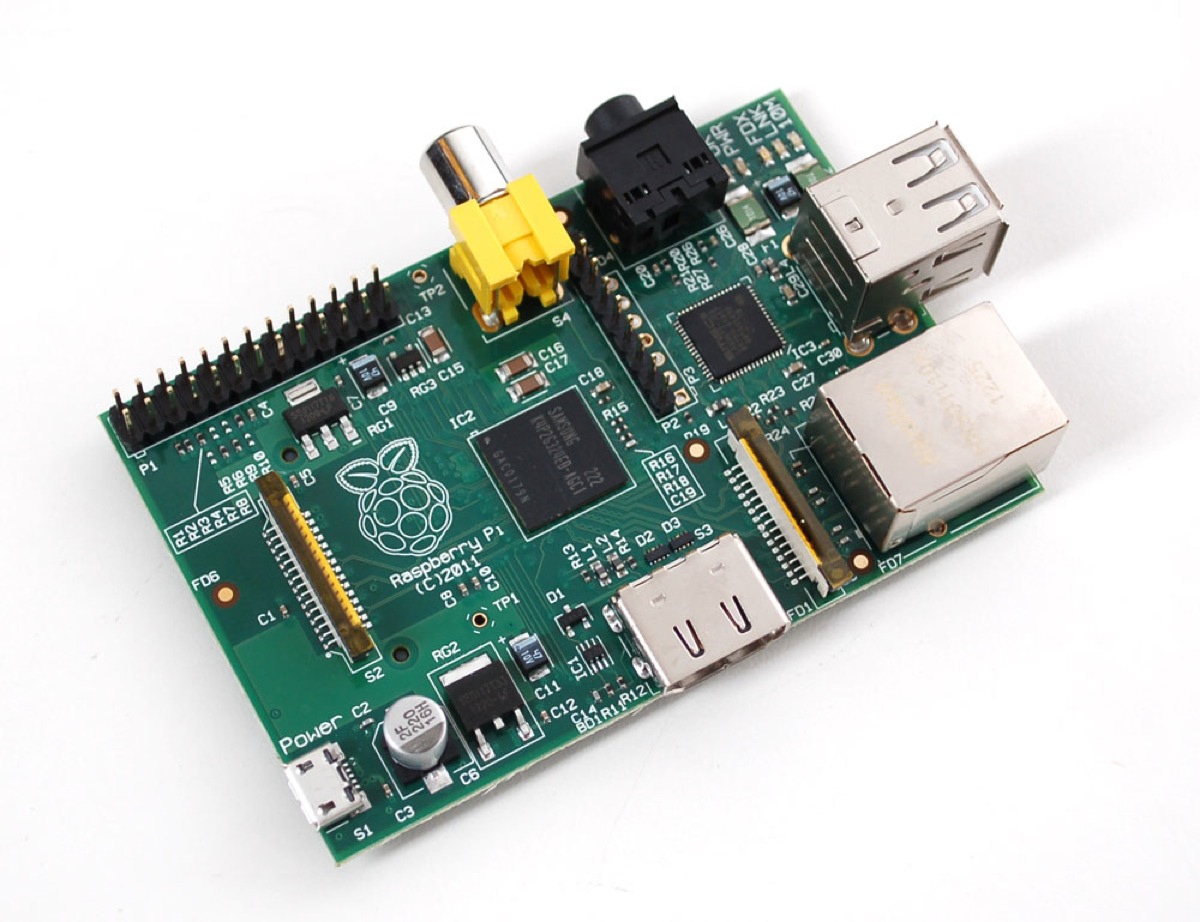
It’s a $35, credit card-sized Linux computer. Linux is an operating system, or OS—Mac and Windows are examples of operating systems, but they are proprietary; Linux, on the other hand, is open source (you can get under the hood and modify it) and it is free to install. Don’t be afraid of Linux—it can look and perform like your Mac or PC, with a desktop, software programs, Internet browser, and solitaire (or minesweeper if you prefer). You can connect a mouse, keyboard and monitor to the Raspberry Pi and have a functioning computer workstation. It accommodates Ethernet or WiFi for Internet access, a high-resolution camera, and audio speakers. The Raspberry Pi is so inexpensive because it was developed in England to teach computer science. You can read more about it here.

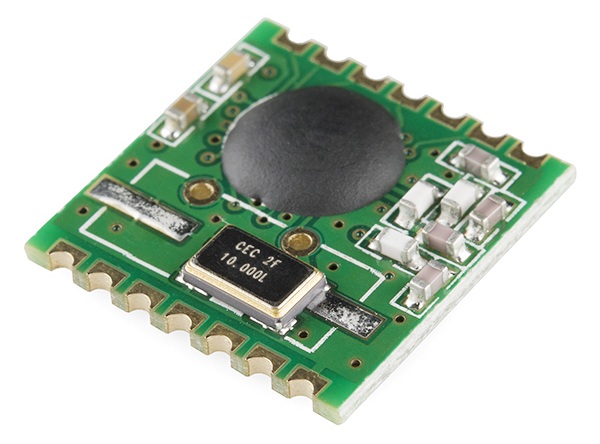
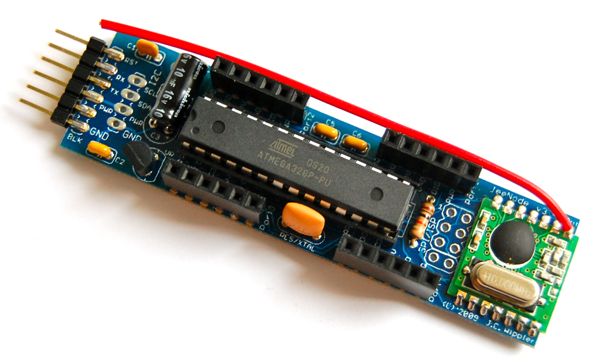
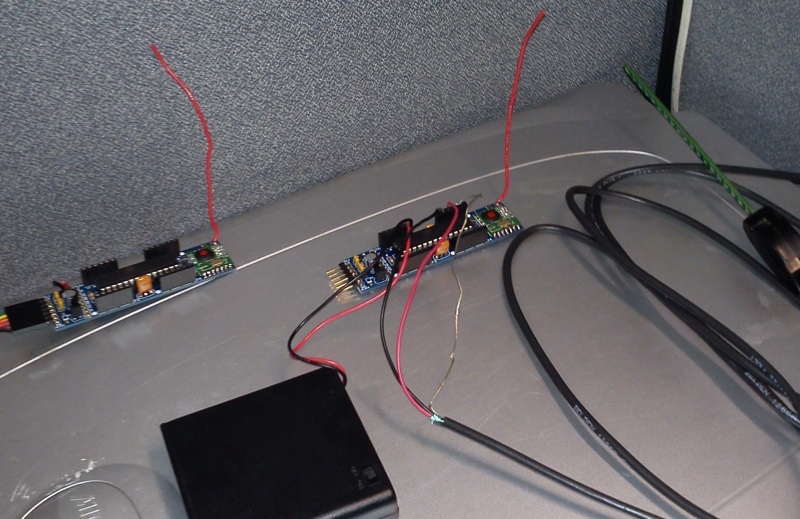
When we combine a Raspberry Pi with the JeeNodes mentioned in the previous post, something incredible happens. Many of our nagging problems and difficulties disappear. With the JeeNode in the garden, we’re using less power from the battery pack. By sending sensor data over radio waves, we don’t have to worry about having WiFi access outside the school. The Raspberry Pi can sit inside the school, receive the data, and upload it to the web. We’re no longer tying up a computer in the school. We’re even reducing the overall cost of the project.

More details on this new configuration to come, but Jeelabs’ Dive Into JeeNodes series of blog posts is a rough guide to the approach we’re taking. Our paths diverge a bit around step 8, but the idea is the same: JeeNodes communicating with each other by radio, and the Raspberry Pi uploading data to a server.

We’re also saying goodbye to Drexel student Tommy Thompson, whose co-op position at the Philadelphia Water Department is ending this week. Many thanks to Tommy for all his hard work and hours of troubleshooting hardware and software. Tommy isn’t a computer science major, but I’m especially proud that he’ll be leaving here with some programming skills in C++ and Python. One day he programmed a game of Pong onto an LED display using the Arduino and a soil moisture sensor as a game control. That was pretty awesome.

06 Sep

Hello, JeeNodes

jeenode

We’ve spent the last few months wandering in the desert, searching for a low-power alternative to the Arduino. (We may have also taken summer vacations and focused on our real jobs—these two things did not happen concurrently.) Google around for solutions to the Arduino current-draw problem, and you’re bound to end up at the JeeLabs site. It’s the online home to a Dutch engineer named Jean-Claude Wippler who, to understate matters considerably, is obsessive about making low-power Arduino-based boards designed to work well with environmental sensors.

Behold the JeeNode, above. It’s about the size of a stick of chewing gum (the old style kind, like Juicy Fruit or Doublemint). It’s basically an Arduino with a radio transceiver attached, meaning it can talk to other JeeNodes via radio frequencies. But best of all, it consumes very little power. Whereas our Arduino consumed 50 milliamps when idle, JeeNodes claim to consume less than 10 microamps. That’s a huge difference—instead of the batteries dying in 3 days, we might see the batteries last for more than a year.

Well, we’ll have to see about that. We got a pair of JeeNodes, hooked them up, and have commenced battery testing:

jeenodes

09 Aug

A Good Schematic Is Worth a Thousand Blog Posts

sunflower_sketch

Thanks to our new team member James Tyack for illustrating our green school sensor configuration. This was a quick sketch he made, so I’m not going to complain about the penmanship. (But c’mon James, really.) In case you’re looking for further illumination, we’re looking at the Arduino with WiFi shield sitting in the rain garden transmitting sensor data via the school’s WiFi network. (The Arduino also records sensor data to an SD memory card as a backup.) The sensor readings are sent to a Ruby on Rails server with a database, and displayed on a website.

28 Jun

Epic Power Fail

Nebinger_plot_June_19

Went back to Nebinger Elementary to check on the snake sensor described in the previous post, and … the batteries were dead. We got about three days’ worth of good data (see chart, above), taking soil moisture and temperature readings every 30 minutes. There was no rain during that period, but it’s clear from the chart when volunteer gardeners went out and watered the vegetable garden—the temperature (blue line) dips as the cold water contacts the temperature sensor, and the soil moisture (red line) increases. (The sensors were not calibrated, by the way, so pay no attention to the numbers on the soil moisture axis; the volumetric water content would not be at all accurate.)

What happened? The Arduino was programmed to go to sleep between sensor readings, using the functions in the Narcoleptic library. The LEDs and sensors shouldn’t be drawing much from the batteries. There were some hot days in that stretch, but it’s cold weather you have to worry about when considering temperature effects on battery drain. Something else is going on.

Here’s where we dusted off the multimeter and made a somewhat surprising discovery. After wiring a circuit to measure current draw, we saw that the Arduino Uno was drawing around 50 mA (milliamps), even while it was idle in sleep mode. I’m no electrical engineer, and this is probably some fuzzy math I’m about to do, but let’s say a AA battery has 2000 mAh (milliamp hours), and the four AAs are wired in series, so current is not additive. (Read this if I just lost you.) So 2000 mAh divided by 50 mA—we can expect about 40 hours of operation; a little less than 3 days. That’s just about what we got with the snake sensor.

Clearly we need a better approach to conserve battery life—a different circuit, a way to minimize the current draw by eliminating the Arduino’s “on” LED or voltage regulator, maybe even look at different microcontroller boards that don’t consume as much power.

19 Jun

Snakes on a Playground

Snake_Sensor_partsThis summer, the playground at Nebinger Elementary School in Bella Vista will lose some impermeable asphalt and gain a rain garden and some porous play surface. It’s all part of a plan to capture stormwater and protect our rivers and streams. But after construction is finished and the vegetation is planted, students may not even realize the function of the system in place.

Thanks to an engaged principal, faculty and educators from the Fairmount Water Works Interpretive Center, however, students are already learning about water-related issues and getting ready for a greener play area (the school already has a very productive vegetable garden in raised planter beds). When teacher Rachel Odoroff was looking for a year-end project for her 7th and 8th grade science classes, we saw an opportunity to introduce some of our work with sensors into the classroom.

The challenge: In two days, work with the students to design and install some sensors to monitor the vegetable garden.

The plan: Well, it’s a bit too ambitious to try to access the school’s WiFi network and get the Solar Sunflower server to display the data, so we decided to make a datalogger to record soil moisture and temperature in the garden. We gave the students a short introduction to the electronics, and they got started with designing the housing. The result? A snake made out of a tupperware container for the head, and pieces of flexible plastic plumbing connectors (the kind you might use to connect pipes under your sink).

Below is the “head” of the snake: an Arduino, an SD card shield (data is written to an SD card, like the memory card in your phone or camera), a battery pack with 4 AAs, and red LED “eyes” that light up when the soil is too dry. The temperature sensor is a black wire that protrudes from the front of the head, like a tongue.

Snake_Sensor_head_sm

Here is the head of the snake in the garden, placed among some tomato plants:

Snake_Sensor_Installed_sm

The tail of the snake—the soil moisture sensor‘s wire threads through the tubing and the sensor is buried about four inches in the ground:

Snake_Sensor_tail_sm

Unfortunately the end of school means the students won’t have an opportunity to examine much of the data, but we’ll be back during the summer to check on the snake every once in a while. We hope to build on this project next year—add wireless communication, upload data to the web in real time, add a light display—and extend it to monitor the rain garden. Thanks to Ms. Odoroff, her students, Drexel co-op Tommy Thompson, and Fairmount Water Works education and outreach coordinator Ellen Schultz for making this project happen. Thanks to PWD engineer Stephen White for coming up with the phrase “snakes on a playground.”