22 Mar

Stroud Shout-Out

Better late than never, a large amount of inspiration for the Solar Sunflower project came from the Stroud Water Research Center, particularly this web page.

stroud_imageImage: Stroud Water Research Center

The image above from Stroud’s website illustrates just how far open-source consumer electronics have come; for a couple hundred dollars, you can build your own sensor network. This is something that was previously off-limits to most civic and non-profit groups—the commercial alternatives cost thousands of dollars. The freedom (literally) afforded by the low cost of these electronic components is important. Sometimes you only want to monitor for a short period of time. Sometimes you have no idea how a sensor will work until you try it out in the field. Sometimes you’ll need to customize your monitoring setup. Arduino and other similar microcontrollers are modular: Switch out the sensors, change the way you power them, try, fail, and try again.

Also worth shouting out is dontflush.me, another fascinating water-related project using real-time low-cost sensors. Arduino-powered sensors detect when a combined sewer overflow is occurring in New York City and lets viewers of the website know not to flush a toilet during these overflow events. (The logic is that flushing a toilet during an overflow would contribute more sewage to the overflow.)

07 Mar

Radio vs. WiFi

xbee        vs. wifi_shield

Pictured above, two ways to skin a cat. Or, in our case, two ways to transmit data from a sensor in the ground to a computer in the classroom. On the left is an XBee, a small radio that attaches to an Arduino via a shield; two XBees can send/receive data. On the right is the Arduino WiFi shield, which connects to the Arduino and sends data via an available WiFi network. After running into a little bit of frustration* with the WiFi shield at this week’s Code For Philly meetup, our group started talking about some of the fundamental decisions we made about data transmission. Below are some pros/cons for using an XBee (or a Wixel, or some other similar radio device) versus a WiFi shield. For the record, the cost is similar—a WiFi shield is $85, two XBees and its shield are around $75.

The nice thing about XBees is that they can be used anywhere. They don’t need access to a wifi network. You can also use multiple XBees to make a mesh network if, say, the rain garden is a good distance away from the school. (The book Building Wireless Sensor Networks by Robert Faludi is a bible in this regard.) On the other hand, weather—especially storms, when we most want to see the data—may affect the transmission. And XBees must be used in pairs, which means an XBee must sit inside a classroom, attached to a computer, to listen for incoming data. We realize that not every classroom has a spare laptop to dedicate to receiving a radio signal. With XBee, there are two legs to the journey from sensor to Web: data transmitted to a computer via radio, then data transmitted from the computer to the server via WiFi (or Ethernet or however that computer connects to the Internet).

Just thinking about the WiFi shield makes me sad that Philadelphia’s dream of the ’00s—a citywide WiFi network—never came to fruition. Accessing a school’s WiFi network is no small feat; the School District’s IT department has to be on board with the initiative (luckily, Philadelphia’s School District IT people have been amazingly supportive of a pilot project). A WiFi shield requires no equipment to be housed inside a classroom, and there’s something attractive about a product that’s a single object, that takes care of business all by itself. Plus, WiFi just seems like … the future. Going forward, there will only be more WiFi access. So we’re sticking with the WiFi shield and will work out the error messages; it provides the most direct link to the Web.

And just as an aside, we’re not married to Arduino over here. There are other boards out there—more of them every week, it seems—that control sensors, connect to the Web, etc. We’re keeping an eye on what’s being developed. Behold, for example, the BeagleBone. Seriously, who names these things?

* “ERROR WEBrick::HTTPStatus::LengthRequired,” if you’re curious.

06 Mar

Ex Post Hackathon Facto

Is my Latin wrong? Missing from the previous post about the TechCamp hackathon were some of the details about our progress and what the next steps are. So here’s what we did:

  • Programmed and wired the Arduino to read 3 sensor values
  • Packaged data as JSON
  • Created a database to handle the data
  • Created a website to display the data
  • Stiff-armed the Drexel proxy server
  • Began testing the Arduino-Ethernet connection

At the conclusion of TechCamp, the website looked like this (no time for spellcheck, btw):

As you can see, it’s just a skeletal version of a website. The important thing is the transmission of the data values. But we came away with a definite to-do list:

Improve Functionality:

  • Sleep mode to conserve battery
  • Average sensor values to discard noise
  • Store data to send later when wifi becomes unavailable
  • Calibrate sensors to specific soil types
  • Refine web interface to include real-time graphs
  • Create a wifi connection using the Wifi shield

Construct the housing and sunflower:

  • Waterproof plastic case for electronics
  • If using PVC, may need to sand blast for painting
  • Determine optimal height, placement, way to secure the sunflower in the garden
25 Feb

TechCamp Philadelphia

techcampheaderWhat just happened? This weekend, the sensor project idea got picked up at a hackathon, gained a whole team of technologists, and is on its way to wirelessly transmitting data to a website with a fully functional database. My first hackathon was a blur of activity, and that’s probably an apt working definition of a hackathon. But for accuracy’s sake, here’s the background on this weekend’s event:

TechCamp is a U.S. State Department program that connects technologists (I don’t like this word, btw) to people who are trying to solve social problems. Many of the previous TechCamps took place in cities in developing countries, and as far as I’m aware this is the first domestic event. It’s a sign of the times: Co-sponsored by the School District of Philadelphia and Technically Philly, this hackathon focuses on our city’s public schools and finding ways to use technology to improve education and administration. The two-day hackathon—the part where programmers and software developers work on a project, such as a mobile app for students—was only one element of TechCamp, but it was the part that enabled the Solar Sunflower project to grow some legs.

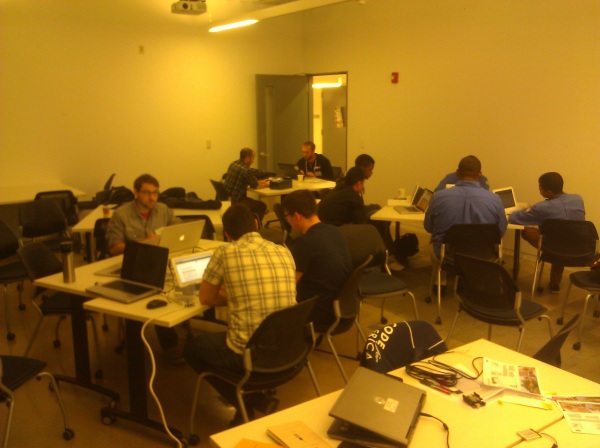
In democratic fashion, the hackathon at Drexel University’s URBN Center began with people contributing project ideas to a whiteboard; groups formed based on interest and requisite skill sets. (Special thanks to Paul Fugazzotto, from PWD public affairs, for attending the first day and helping to generate interest for the sunflower.) I was lucky to get hooked up with three really talented programmers: Christopher Nies, a Python developer; and Kevin Clough and Jason Blanchard, both of whom do development with Ruby on Rails (more on that shortly). Here’s some of our team working in the foreground this weekend:

TechCamp_hackathon

After I explained the project and gave some background information, Chris, Kevin and Jason had a plan of attack in place within minutes: We’re going to send JSON packets containing sensor data over wifi from the Arduino to a Ruby on Rails application running on Heroku. You got that, right?

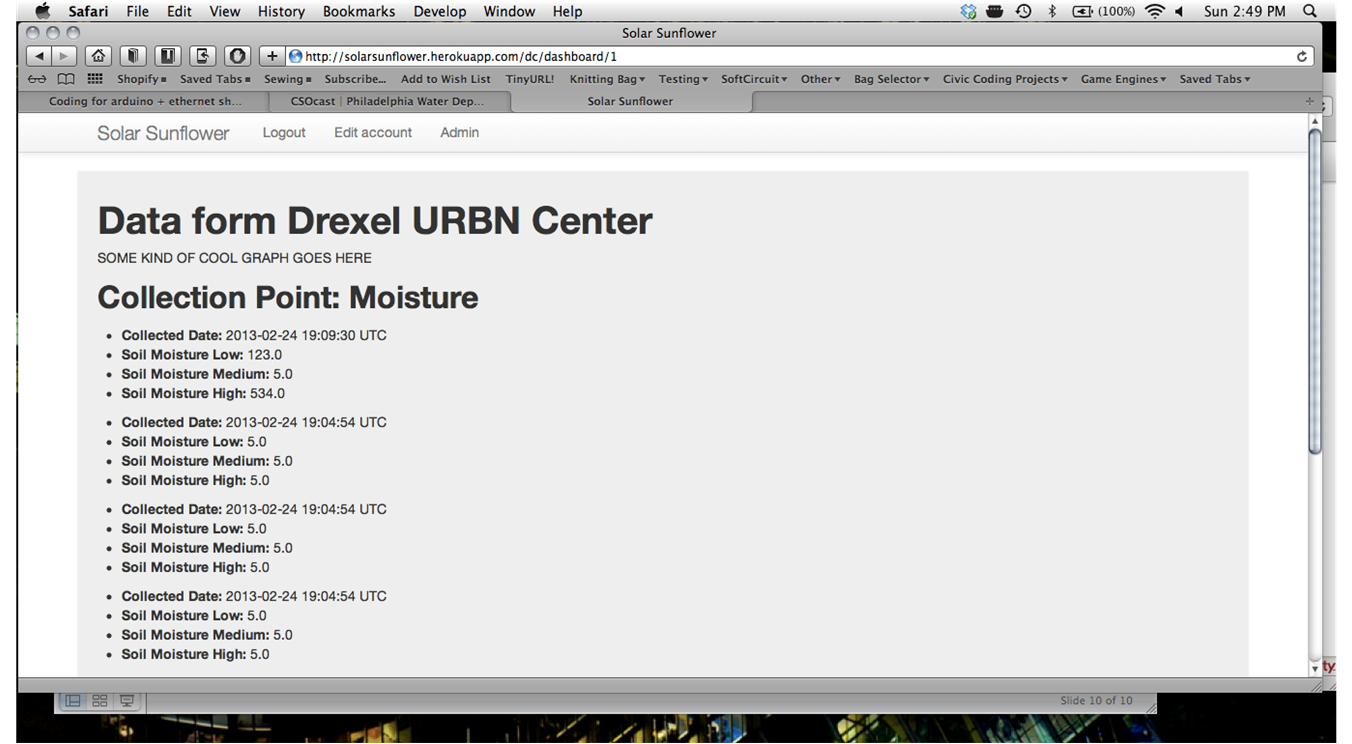
Let’s try that again. The Arduino is going to hook up to a wireless network. In our case, it would be the school’s network (special thanks to School District of Philadelphia IT personnel—Melanie Harris, Phil Ichinaga, Sam Garst—for their support of the project). It’s going to send sensor values in a data structure called JSON, which stands for JavaScript Object Notation. JSON is kind of like the envelope that holds a letter: It is code that encloses the data in a simple, lightweight wrapper that is human-readable and easy to work with. Inside the JSON code you might specify the location of the sensor (site name), an ID for each sensor (soil sensor 1, soil sensor 2, etc.), the actual data value, maybe even a timestamp. The server is then configured to receive the data so it knows what to expect from the packet.

Now the most difficult part (for me, at least): Ruby on Rails. Ruby is a programming language, like Python or PHP or C++. Rails, on the other hand, requires a little more explanation. It is a web application framework that runs on Ruby. Oh right, a “web application framework.” I’m sure the finer points of Rails will reveal themselves in time, but for now I’m satisfied to know that it provides a way to build websites quickly, using less code than other approaches. (Full disclosure: Although I do consider myself a novice at programming, I have experience with HTML, CSS and other website-related things.)

Heroku is a cloud hosting platform. It’s a place to put a website. It’s free, up to a certain point of usage. This makes it a smart choice for projects under development.

Most of the progress made during the hackathon involved getting the server and website set up, programming the Arduino to talk to the server, and wiring up the sensors. Throughout, we had many people—educators, scientists, students—stop by our table to learn about the project. While I mainly preached the gospel about green infrastructure and stormwater management to our many visitors, Kevin, Chris and Jason did the heavy lifting on the tech side. Here’s a shot of our setup:

TechCamp desk

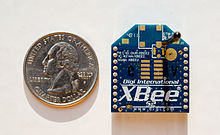
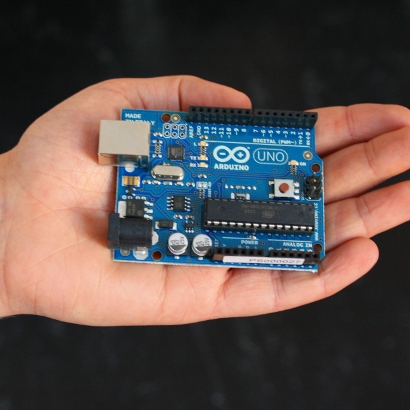
In the photo above, we have three soil moisture sensors wired to a breadboard (a plug-in board that lets you connect circuits without soldering wires) and connected to a Bluetooth shield. We ended up not using Bluetooth to transmit data; to the right of the breadboard is an Arduino and Ethernet shield that provides a better way to connect to the web. (Connecting via wifi is on the to-do list; we just wanted to test our connections to the server and Heroku site.)

Even though I arrived with a duffel bag full of electronics—Arduinos, sensors, breadboards, cables—at one point I had to steal away to Radio Shack to buy the Ethernet shield for the Arduino. It cost around $20. Now, I’ve become a semi-regular customer at various local Radio Shacks since embarking on this project, and I’ve never underestimated the base-level weirdness of the Shack’s clientele. But this time was special: A lady, perhaps thinking I worked at the store, asked me which digital converter box would scramble signals from her TV … because the people from the TV were accessing her brain and stealing her thoughts.

But I digress. Our team wasn’t able to do a live demo of the sensors transmitting data to the web, but we gave a solid closing-night presentation in front of a great audience of educators and the tech community. Best of all, the team resolved to keep working on the project, and we’ll get together at Code For Philly meetups in the future. More than anything, I was astonished at the level of interest and support for this project and hope to keep the momentum going.

04 Feb

Hello, Arduino

arduino

It’s pronounced “Ar-DWEEN-oh.” It’s Italian for “$25 Radio Shack computer.” (Not really.) But it is made in Italy, the basic model costs about the same as a decent haircut, and it is a deceptively powerful microcontroller board that fits in the palm of your hand. Learn more about it here. Attach some sensors to the Arduino and program it to take temperature, humidity, or soil moisture readings. Modify the Arduino (using snap-on components called shields) to send that environmental data to a website, post it on Twitter, or text it to your phone. There is a huge community of Arduino hobbyists—regular people who use these things to water houseplants, open a chicken coop door, or create a laser harp. (OK, that last guy may not be a regular person.) Point is, there are many jumping-off points for people who have never programmed a computer before; the code is “open source,” meaning it is free for users to modify as they see fit; and it is getting easier for beginners to do inexpensive, custom electronics projects.

What does this have to do with monitoring rain gardens, maintaining healthy trees, and all that stuff in the previous post? The Arduino provides a cost-effective way to start exploring how we can monitor our green stormwater infrastructure projects. It’s also a great teaching tool—it’s becoming more and more common for engineering students to use an Arduino in a freshman-year design lab. We’re just about starting from scratch. I’m not an electrician or a computer programmer; I’m an environmental engineer whose day-to-day work involves water quality in rivers and streams.

That said, I don’t mean to lead anyone down the primrose path and insinuate that the Arduino can be plugged in and instantly operated with a few mouse clicks. There is a learning curve. There is a seemingly arcane vocabulary associated with it: pins, shields, code libraries, the Uno, the Leonardo, the IDE and the ADCs. To that end, there are both print and online resources available to help you get started. The following is not an endorsement of any particular book or website—these just happen to be the ones I relied on to get started learning about Arduino.

The book Beginning Arduino by Michael McRoberts is a good kickstart. To be honest, I didn’t go much beyond the first two chapters because the rest of the book steps you through specific projects. I had my own agenda and sensors that I wanted to experiment with. The website Adafruit sells Arduino and related products (sensors, battery packs, etc.), and also features excellent tutorials on how to use them. SparkFun also stands tall among online stores, and its tutorials focus on the basics of electronics (voltage, resistors, analog vs. digital) for those who need more background. Shop around for the best prices. There are many online forums dedicated to Arduino projects and troubleshooting, but they can be daunting. To jump right in with a project, check out Instructables or Make for step-by-step tutorials with photos.