12 Jun

Lies We Told About Solar Power

usbdcsolarchargeruse_MED

It’s time to come clean about the “solar” part of the Solar Sunflower—it isn’t happening right now. As it stands, a 9-volt battery powers the Arduino inside the sunflower’s head. There are practical reasons why the solar portion of the project is still under development: It isn’t convenient to rely on solar power when doing an indoor demonstration, and the sunflower design would likely place the solar panel over the top of the electronics in the head, making it difficult to disassemble when needed.

But mostly, we need to do a lot more legwork and research. Adafruit sells the components to make a solar charger that powers a Lithium ion battery (pictured above) and has a terrific tutorial on how to assemble it. Will it provide enough power for the Arduino WiFi shield, which operates at 5 volts? Will it be reliable, especially at low light levels during a storm? I assembled the solar charger at home and used it to charge my cell phone:

solarcharger

Only in direct sunlight did I get the voltage needed to charge the phone. It’s worth testing with the sunflower setup, but more research is needed across the board with regard to powering the sensors. We’ll do that right after I clean my windowsill.

07 Jun

Show Me The Code

arduino_codesample

At this point, we have a working version of the Solar Sunflower: An Arduino equipped with a WiFi shield sends sensor data to a server. Some of you might be wondering where the code is. The short answer is that it’s at our GitHub repository (more on this shortly). There you can find the Arduino code (a screenshot of it is posted above), the Ruby code for the server, and documentation and revision history. We’ll definitely be discussing the project’s technical issues in this blog, but it isn’t meant to be a documentation of our code. The code is going to change many times over the course of this project, and it isn’t always interesting or productive to list every little change here. Go to GitHub.

If you’re not familiar with GitHub, here’s what we wrote in the FAQ section:

GitHub is a website that hosts files for tech development projects. It’s kind of like Google docs for programmers. GitHub allows multiple people to work on code separately, then merge the changes back into one file.  Groups of files (for a certain project, for example) are collected in one location called a repository.

24 May

Greenfield Site Visit

greenfield_secretgarden

As detailed in a previous post, Greenfield Elementary School in Center City Philadelphia is one of the Water Department’s “green schools.” (It’s an environmentally conscious school in its own right, regardless of PWD’s designation, but the green stormwater infrastructure at the schoolyard is what connects the Solar Sunflower project to it.) Earlier this week, we paid a visit to the school during an in-service day (a day without students, when teachers receive some training) to present the project to the faculty and scope out possible spots for installation.

greenfield2

There’s good news and bad news about Greenfield, at least for the moment: On the challenging side, the main schoolyard and rain gardens are pretty much open to the public—the space is not gated or closed at night, so that leaves the Sunflower or any type of sensor setup vulnerable to vandalism. It isn’t a dealbreaker; we just need to invest much more time into securing sensors and electronics inside heavy-duty housing bolted into concrete or enclosed in a junction box.

Then we were taken around the side of the school and saw … the secret garden. It doesn’t contain green stormwater infrastructure, but it’s secured behind a padlocked gate and serves as an outdoor classroom for the kindergarten classes. Additionally, the library window overlooks the secret garden:

greenfield_window

This makes it possible to do something visual with the sensors in the garden—maybe an LED display lights up when the soil is dry, and students looking out the window can get the bat signal to go out and do some watering.

26 Apr

Philly Tech Week 2013

20130425_inq_gelles25-bImage: Philadelphia Inquirer

That’s my co-worker, PWD engineer Chris Bergerson, at the Switch Philly event this week. He got his picture in the newspaper because he happened to be standing near the sunflower at some point. Nice job, Chris. (But for real, thanks to Chris and Tommy Thompson for helping out.) This photo shows the head of the sunflower a little bit better—the Arduino and battery pack are inside a waterproof plastic snap case, with a hole drilled in the back for the sensor wires. We didn’t put a covering over the electronics, because we wanted them to be visible for now. (It also makes it easier to access.)

Chris Nies, Kevin Clough, Jason Blanchard and I did a five-minute presentation and complete demo of the Solar Sunflower. We put the sunflower in a bucket of soil, poured some water into the bucket, and watched (apprehensively—soil moisture is not the most dynamic thing in the world) as the website updated data values in real time. A total success, and we took second place in the competition. Congratulations to the winning team (Temple MESA), a group of students who devised a tutoring application. Here’s some more coverage on Technically Philly.

Here we are at Switch Philly, with the sunflower doing a total eclipse of Tommy’s head.

PhillyTechWeek

19 Apr

Solar Sunflower Comes Alive!

OLYMPUS DIGITAL CAMERA

It’s alive!

It’s not really alive. But it has been built—just in time for next week’s demo at Philly Tech Week. The sunflower was built with the generous assistance of PWD aquatic biologist Jay Cruz and Drexel University student Tommy Thompson, who’s currently a co-op with our Watershed Sciences group. It’s heavy; it’s mostly made from repurposed metal pipes we had lying around in a PWD garage. We originally thought it might be made of PVC, but we already had the pipe, and PVC is difficult to paint (it requires roughing up the surface so the paint sticks). Let’s have a look at the construction:

sunflower_construction

Pipe sections and pipe fittings were assembled, with three cross fittings on the bottom for the three soil moisture sensors. The yellow cable at the top is a flexible gas hose from Home Depot, the kind that attaches to the back of a gas stove.

sunflower_roots

A closer look at the “roots.” The wires from the sensors thread up through the pipe/”stem.”

sunflower_drill

The head of the sunflower is a cheap mixing bowl from IKEA, drilled through the center to attach it to the flexible gas hose.

sunflower_head

A threaded gas connector holds the head in place. The tubing is a little too flexible; the head droops a bit but it can easily be stabilized with some rigid wire (like a length of coat hanger) or a pipe section around the hose that acts as a sleeve.

sunflower_paint

A quick spray paint of the head and flexible gas hose.

sunflower_petals

Found some yellow and green plastic containers at the dollar store; cut out petals and leaves from stencils; did battle with a hot glue gun. Arts and crafts is not our strong suit, but it’s presentable enough. Here’s the sunflower in my cubicle, freaking people out.

12 Apr

Web Display Mockup

phillywatersheds_screenshot

Here’s a quick mockup of a web page displaying data from the Solar Sunflower—none of this represents real data. It helps to visualize what the end product looks like, where the site lives (this presents it as a page on phillywatersheds.org, a Philadelphia Water Department website), and what features we want. Let’s break down what we’ve got so far:

  • A multi-line graph that’s updated in real time with soil moisture sensor values. Three data series, three soil moisture sensors. This sample image was generated using Javascript D3, a really powerful graphing library.
  • A “water me!” graphic. This could be something as simple as an image swap; when the soil sensors read below some threshold value for moisture, a raindrop appears. When the value is above the threshold, a green leaf is shown.
  • A map of locations of all the sensors. Although we’re only dealing with two sites at the moment (Greenfield and Nebinger Elementary schools), hopefully there will be a growing network of schools involved. By encoding latitude and longitude of each school, we can click on a point on the map and call up that school’s current data.
  • And finally, downloadable text or Excel files of the data. This doesn’t sound too exciting, but I think it’s where the in-depth educational value lies. Creating plots, correlating data, identifying trends, and analyzing statistics all rely on access to this raw data.
10 Apr

AT&T EduTech Hackathon

edutech_hackathon
Image: Technically Philly

This weekend, the Solar Sunflower project was selected as one of 5 finalists to advance to the Switch Philly event on April 23 and compete for a $5,000 prize. The field was narrowed down at the AT&T EduTech hackathon at Temple University on Saturday. Like TechCamp, the hackathon (organized by AT&T, Jarvus, Technically Philly and Temple’s Urban Apps and Maps Studio) focused on using technology to improve education. Some of the other projects included a mobile app that helps students find the safest walking route to school; a game app that uses a fantasy-football approach to tracking learning progress; and an app that connects students with tutors.

Not all our team was there, but Chris Nies and I were able to present a working demo of real-time sensor data being posted to the web in front of an audience and a panel of judges. It sounds pretty rosy in hindsight, but to be honest we spent hours just trying to send data via Temple’s WiFi network; these things happen. Thanks to Jarvus’ Chris Alfano and Technically Philly’s Brian James Kirk for their support and encouragement.

Here’s Technically Philly’s coverage of the event. We stole their photo of our box of Arduino stuff, above.

29 Mar

2013: A Hackerspace Odyssey

devnuts

We’ve been hacking at a hackerspace for our next hackathon. For me, the term “hacking” is one of the more egregious tech misnomers, because it seems to imply taking something apart. Of course, it used to mean something different (such as breaking into a computer system) but all I ever see at hackerspaces (places where hacking occurs) are creative people making new things by grabbing data from the web, modifying code and bending it to their will. Devnuts, in Northern Liberties, is where we’ve been gathering on Tuesday nights for the Code For Philly meetups. That’s not us in the photo of the Devnuts space above, but you can spot Code For Philly organizers Christian Kunkel and Chris Alfano (who also work at Jarvus Innovations). The Code For Philly meetups are a great way to get started on a project, learn a new tech skill, or just see what people are doing. The sense of community is amazing, and we’re grateful for all the time and resources that Chris, Christian and others put into organizing the event.

In addition to Devnuts, there are many other hackerspaces in Philly worth checking out. Last week, I visited Hive76 and spent a few hours soldering a circuit board. Thanks to those guys for their advice and letting me use their equipment. I hope to someday visit and use NextFab studio, which is more of a building/manufacturing space that might be useful when we start to build the sunflower and the waterproof housing for the sensors. I’m sure there are many more venues out there—many have an open house night or introductory workshops for the uninitiated.

Anyone who wants to keep up with the tech scene should bookmark Technically Philly. The site is fairly relentless in documenting all the events and news that involve local startups and tech projects.

But as mentioned before, there’s a hackathon coming up: The AT&T EduTech hackathon at Temple University on April 6. We’ve smoothed out the kinks in our code and have the Arduino posting sensor data to the website. On the wish list is a multi-line graph to plot the data in real time on the site.

22 Mar

Stroud Shout-Out

Better late than never, a large amount of inspiration for the Solar Sunflower project came from the Stroud Water Research Center, particularly this web page.

stroud_imageImage: Stroud Water Research Center

The image above from Stroud’s website illustrates just how far open-source consumer electronics have come; for a couple hundred dollars, you can build your own sensor network. This is something that was previously off-limits to most civic and non-profit groups—the commercial alternatives cost thousands of dollars. The freedom (literally) afforded by the low cost of these electronic components is important. Sometimes you only want to monitor for a short period of time. Sometimes you have no idea how a sensor will work until you try it out in the field. Sometimes you’ll need to customize your monitoring setup. Arduino and other similar microcontrollers are modular: Switch out the sensors, change the way you power them, try, fail, and try again.

Also worth shouting out is dontflush.me, another fascinating water-related project using real-time low-cost sensors. Arduino-powered sensors detect when a combined sewer overflow is occurring in New York City and lets viewers of the website know not to flush a toilet during these overflow events. (The logic is that flushing a toilet during an overflow would contribute more sewage to the overflow.)

07 Mar

Radio vs. WiFi

xbee        vs. wifi_shield

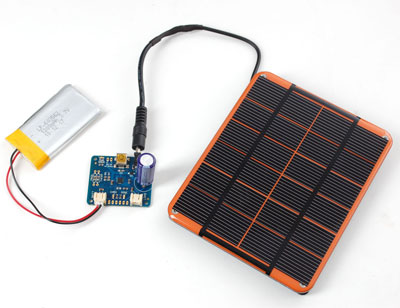
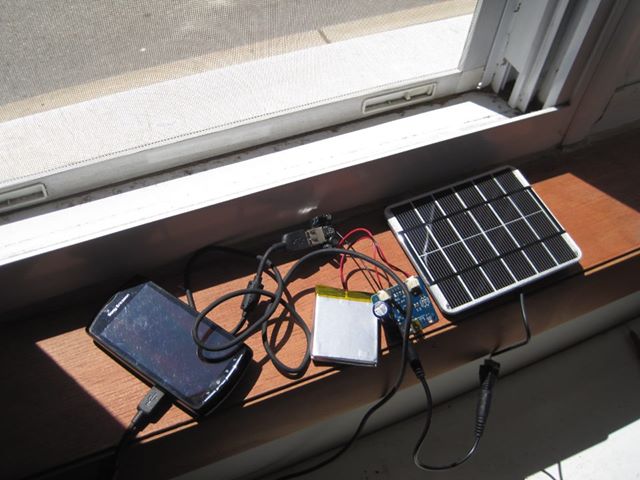
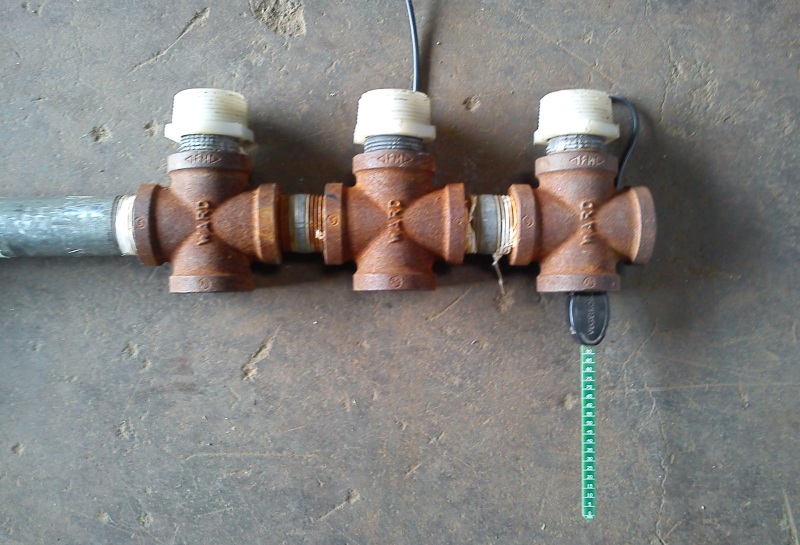
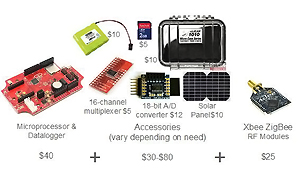
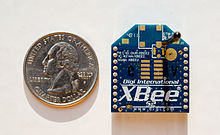
Pictured above, two ways to skin a cat. Or, in our case, two ways to transmit data from a sensor in the ground to a computer in the classroom. On the left is an XBee, a small radio that attaches to an Arduino via a shield; two XBees can send/receive data. On the right is the Arduino WiFi shield, which connects to the Arduino and sends data via an available WiFi network. After running into a little bit of frustration* with the WiFi shield at this week’s Code For Philly meetup, our group started talking about some of the fundamental decisions we made about data transmission. Below are some pros/cons for using an XBee (or a Wixel, or some other similar radio device) versus a WiFi shield. For the record, the cost is similar—a WiFi shield is $85, two XBees and its shield are around $75.

The nice thing about XBees is that they can be used anywhere. They don’t need access to a wifi network. You can also use multiple XBees to make a mesh network if, say, the rain garden is a good distance away from the school. (The book Building Wireless Sensor Networks by Robert Faludi is a bible in this regard.) On the other hand, weather—especially storms, when we most want to see the data—may affect the transmission. And XBees must be used in pairs, which means an XBee must sit inside a classroom, attached to a computer, to listen for incoming data. We realize that not every classroom has a spare laptop to dedicate to receiving a radio signal. With XBee, there are two legs to the journey from sensor to Web: data transmitted to a computer via radio, then data transmitted from the computer to the server via WiFi (or Ethernet or however that computer connects to the Internet).

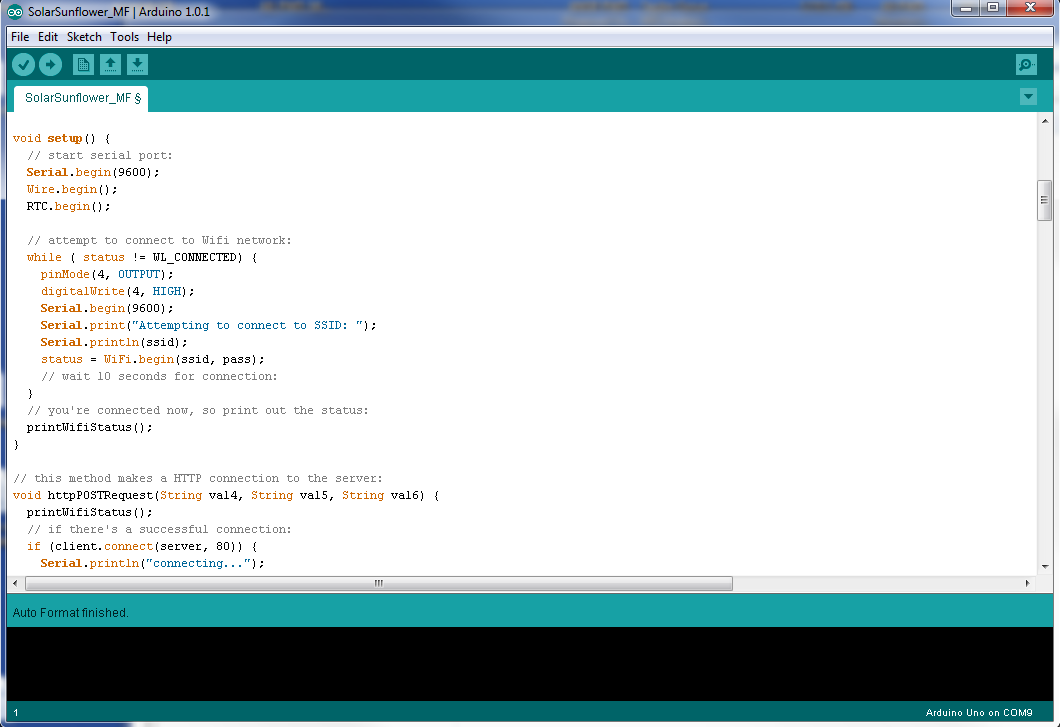
Just thinking about the WiFi shield makes me sad that Philadelphia’s dream of the ’00s—a citywide WiFi network—never came to fruition. Accessing a school’s WiFi network is no small feat; the School District’s IT department has to be on board with the initiative (luckily, Philadelphia’s School District IT people have been amazingly supportive of a pilot project). A WiFi shield requires no equipment to be housed inside a classroom, and there’s something attractive about a product that’s a single object, that takes care of business all by itself. Plus, WiFi just seems like … the future. Going forward, there will only be more WiFi access. So we’re sticking with the WiFi shield and will work out the error messages; it provides the most direct link to the Web.

And just as an aside, we’re not married to Arduino over here. There are other boards out there—more of them every week, it seems—that control sensors, connect to the Web, etc. We’re keeping an eye on what’s being developed. Behold, for example, the BeagleBone. Seriously, who names these things?

* “ERROR WEBrick::HTTPStatus::LengthRequired,” if you’re curious.